The iPhone Duo introduces a bold step forward in smartphone design, combining a foldable screen with advanced multitasking capabilities. While Apple emphasized these headline features during its launch, the device also conceals a variety of lesser-known functionalities that can significantly enhance your daily experience. These hidden features offer greater customization, convenience and efficiency, making the […]
We put glow on everything we are afraid of losing in the dark. Watch hands, exit signs, stair edges, light switches, and those plastic stars on a kid’s ceiling all got the memo decades ago. The carabiner, an object whose entire job is hanging onto things in low light, somehow missed it. It sits there, smug in anodized aluminum, daring you to find it. That is the oversight of the century, and I will happily defend that claim at any campsite.
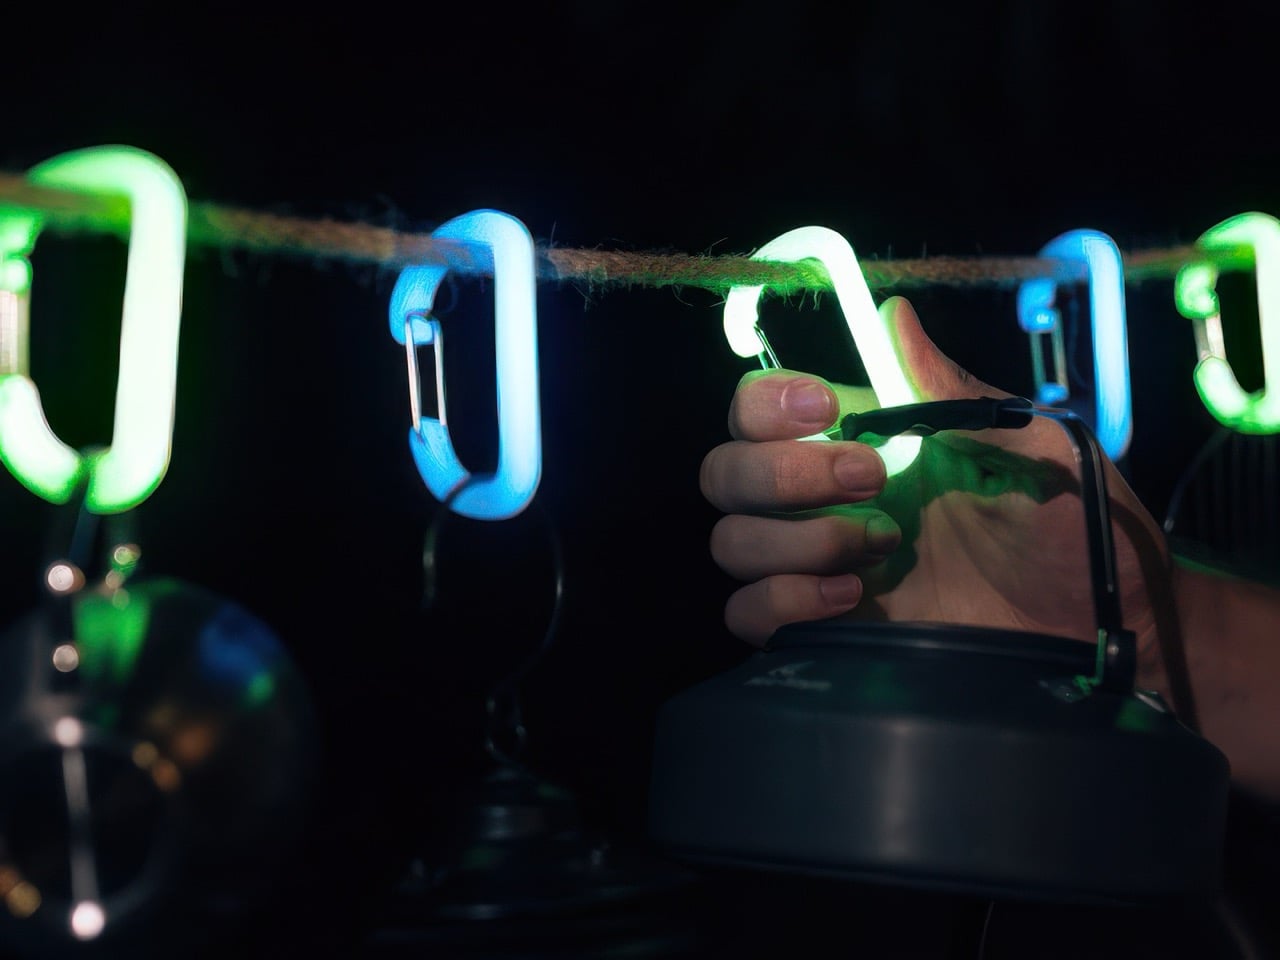
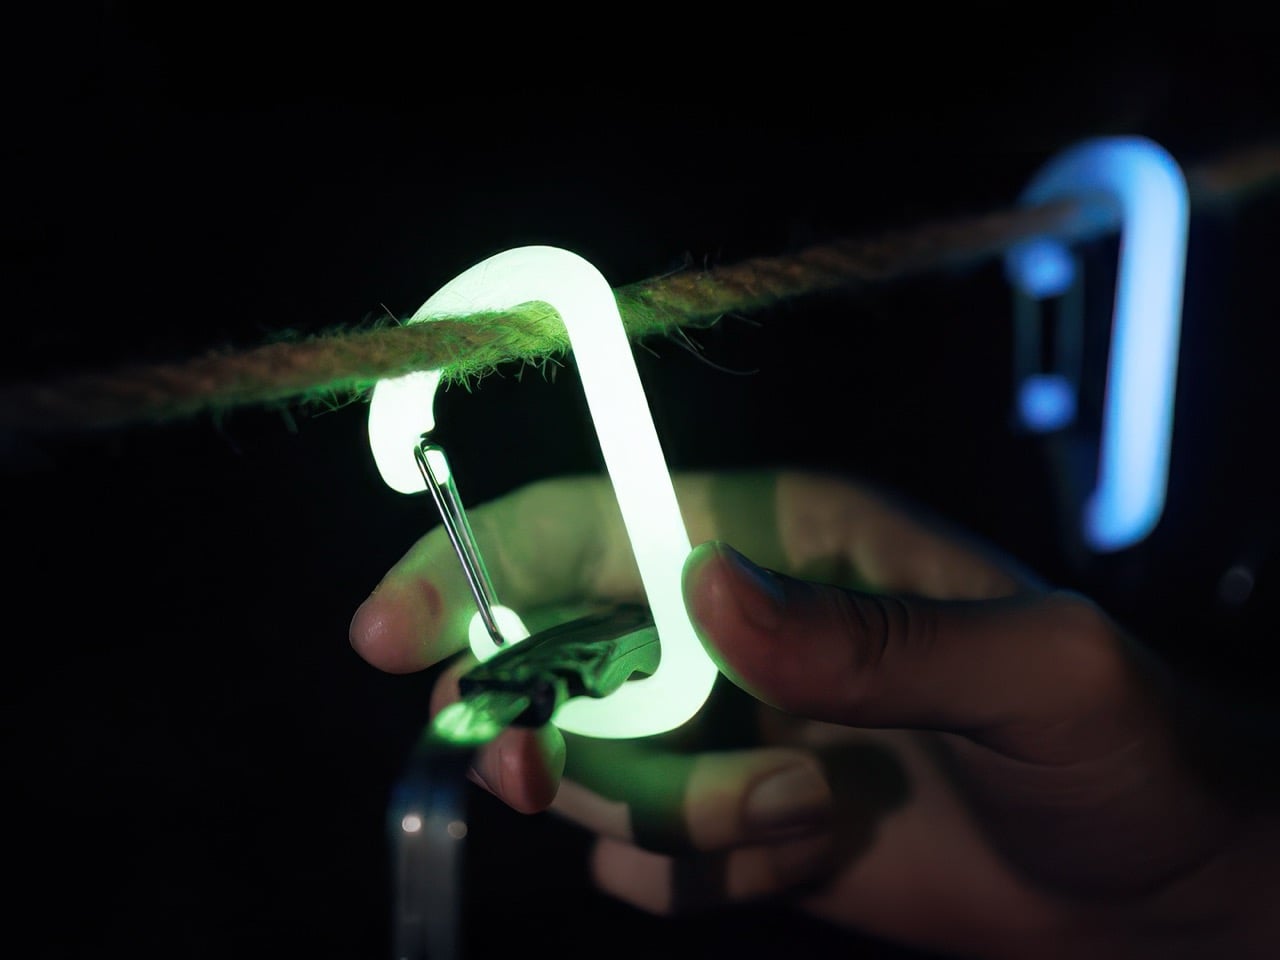
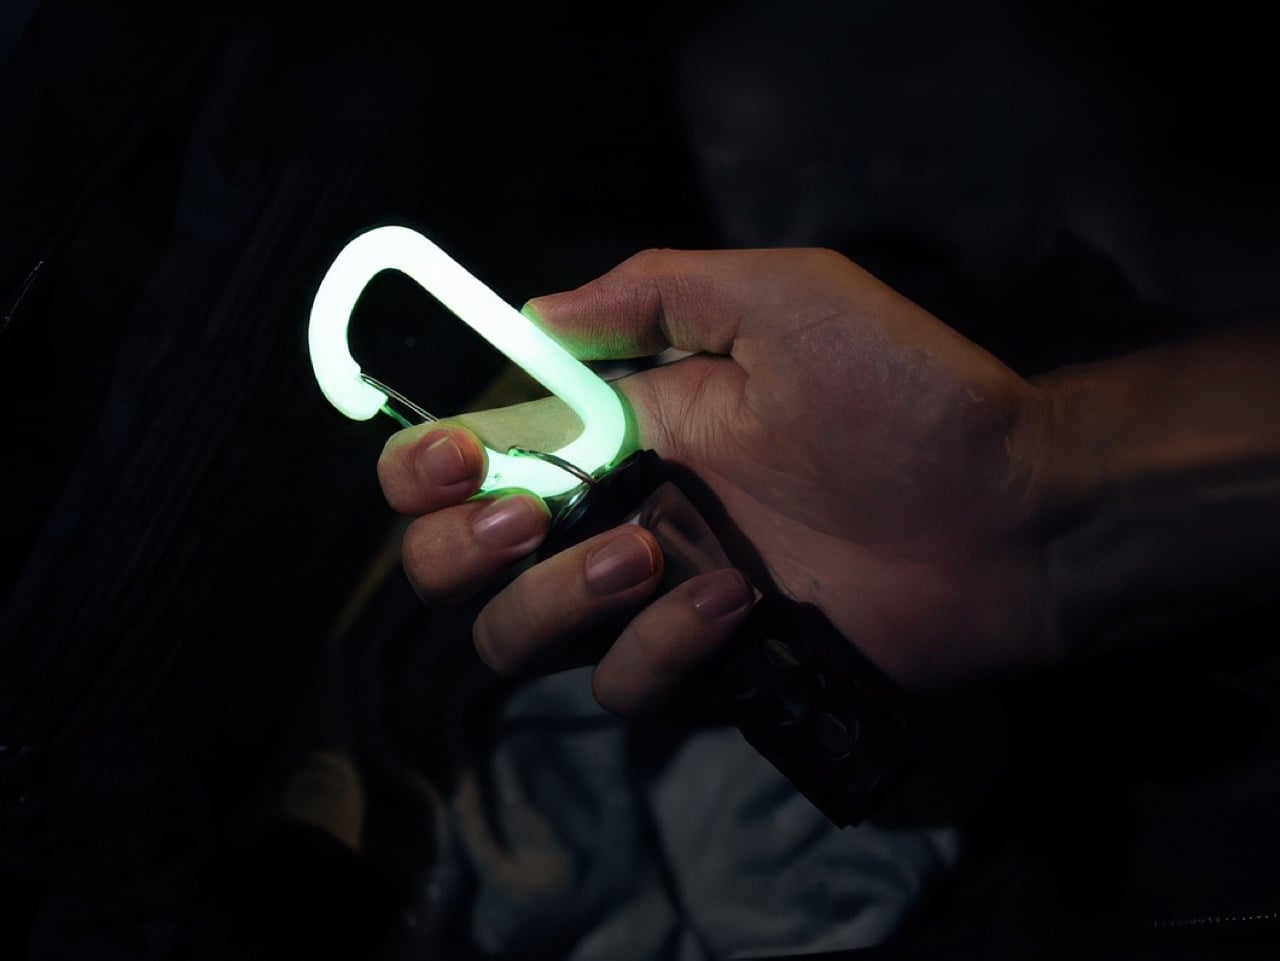
OBORO, from Maruhachi Kasei, a plastics factory in Nagoya, Japan that has been molding resin since 1974, closes the loop. The large D carabiner is glow-infused polycarbonate, measures about 3 by 1.7 inches, weighs 0.42 ounces, and is rated for 66 pounds. Leave it in sunlight or under a lamp for a bit and it shines for hours, with no battery, no charging, and no app (thankfully). A one-handed clip joins it for towels and tarps, rated for 55 pounds, and both come in green or a cooler blue. It is accessory gear rather than climbing gear, so keep your rope work on the real stuff.
The glow pigment is mixed into the polycarbonate itself, so the entire body is the light source. There is no paint layer to chip or flake, which matters on an object that spends its life banging against rocks, zippers, and other gear. Polycarbonate is the same family of plastic used in bulletproof glazing, and the maker claims five times the impact resistance of ABS and 250 times that of ordinary glass. It also handles weather and heat better than most plastics. The gate is a nickel-plated metal wire, the one part that has to flex thousands of times, so it makes sense that it is not resin.
In the maker’s own test, twenty minutes under a blacklight gave about three hours of visible glow. Brightness peaks in the first 10 to 20 minutes and fades gradually from there, the way every glow-in-the-dark thing you have ever owned behaves. Sunlight and ordinary LED room lighting both recharge it, as many times as you like. Long-afterglow pigments like this trace back to a 1993 breakthrough at Japan’s Nemoto & Co., the lineage behind Super-LumiNova on Swiss watch dials, though the maker does not name its exact pigment. Water is the weak spot: the maker says wet pigment loses its charge and the surface can cloud, so this belongs in the tent, not out in the rain.
A Bigger Gate, Beefier Numbers, and a Clip for Towels
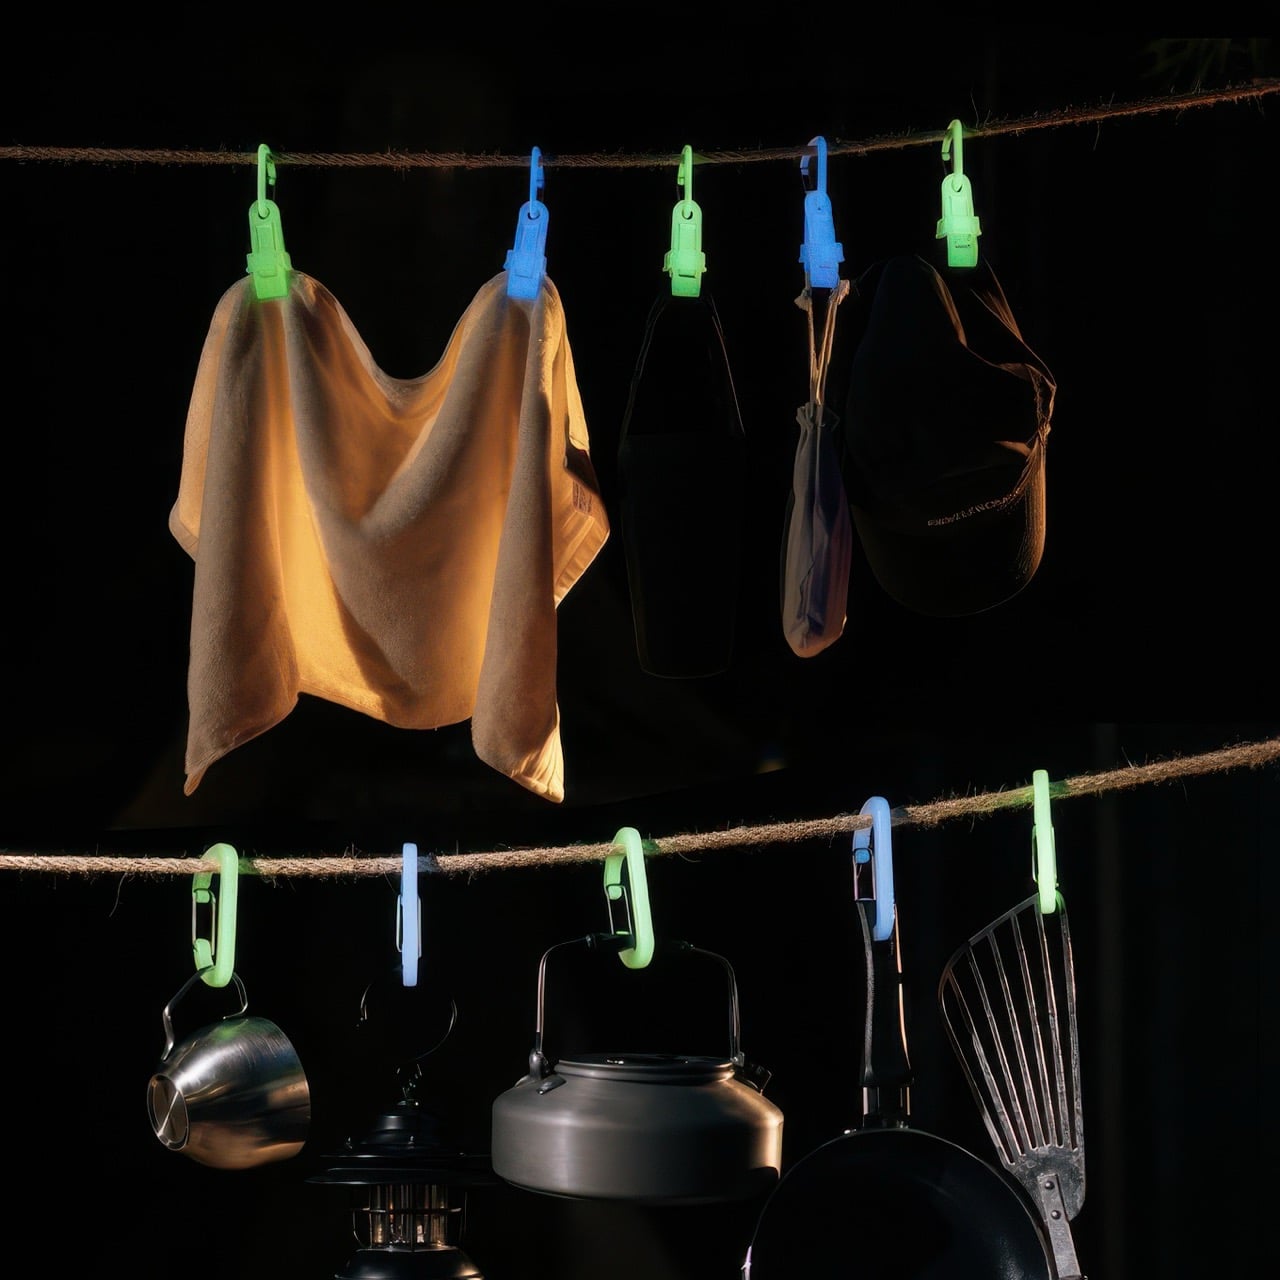
The large D measures about 3 by 1.7 inches and 0.28 inches thick, which the maker says is 30 percent bigger than a standard carabiner. That extra room is the whole point of the redesign. The gate opens wide enough for thick camp rope, so a mug, a kettle, and a lantern can all hang without a game of Tetris. The working load is rated at 66 pounds, while the maker’s pull test ended at 213 kilograms, roughly 470 pounds. That gap is deliberate, since the rating sits near 15 percent of breaking load, and at 0.42 ounces you will forget the thing is on your bag until you need it.
The clip is built for flat, floppy things like towels and tarps. It opens and closes with one hand, using serrated jaws and a sliding block with a toothed lock, and a thin metal loop up top lets it hang from a line or a bag. The wide mouth takes thick fabric where a standard clothespin gives up. Its 55-pound rating sits a bit under the D carabiner, which is plenty for a soaked camp towel. Two clips and a rope between trees give you a glowing clothesline you can actually find after dark.
Two Colors, Endless Things to Hang, and Roughly $6 a Piece
Green is the classic and the brighter of the two, while blue is the rarer, cooler color that I find more fun to look at. By day neither looks like it does at night, since green reads pale yellow-green and blue looks milky white. Blue is dimmer after dark, which seems a fair trade for the novelty. The use cases click once the idea sinks in: a tent guyline, a go-bag handle, a kid’s school backpack, a dog’s leash, a key hook by the front door.
The 12-piece set (six large D carabiners and six clips) is ¥11,616, about $73, against a ¥14,520 (about $91) retail price, which works out to roughly $6 a piece. Singles run about $6 for a D carabiner and about $7 for a clip. Pink versions of both ($40 for six of each), a three-pack of Suncheck glow carabiners ($33), and the older Ouroboros Carabiner Clip ($4) are available as add-ons. OBORO ships worldwide with delivery estimated for January 2027.
A multitool can earn its place in your pocket, right up until its weight makes you leave it at home. Pliers, blades, drivers, and openers all need somewhere to go, and those stacked layers of steel add up. If your daily repairs mostly involve opening a package or tightening a loose screw, carrying the entire assortment can feel like packing a toolbox for a job that takes thirty seconds flat.
The five designs here keep their ambitions small and their functions specific. There’s a DIY toolkit inside a Zippo case, a utility knife with a magnetic ruler, a keychain tool, a flat flashlight, and compact scissors with a few useful extras. Each offers a different way to pare down your everyday carry. Pick the one that matches your usual tasks rather than treating the collection as a pocket packing list.
1. Tiny Tool Shop’s DIY Zippo Toolkit
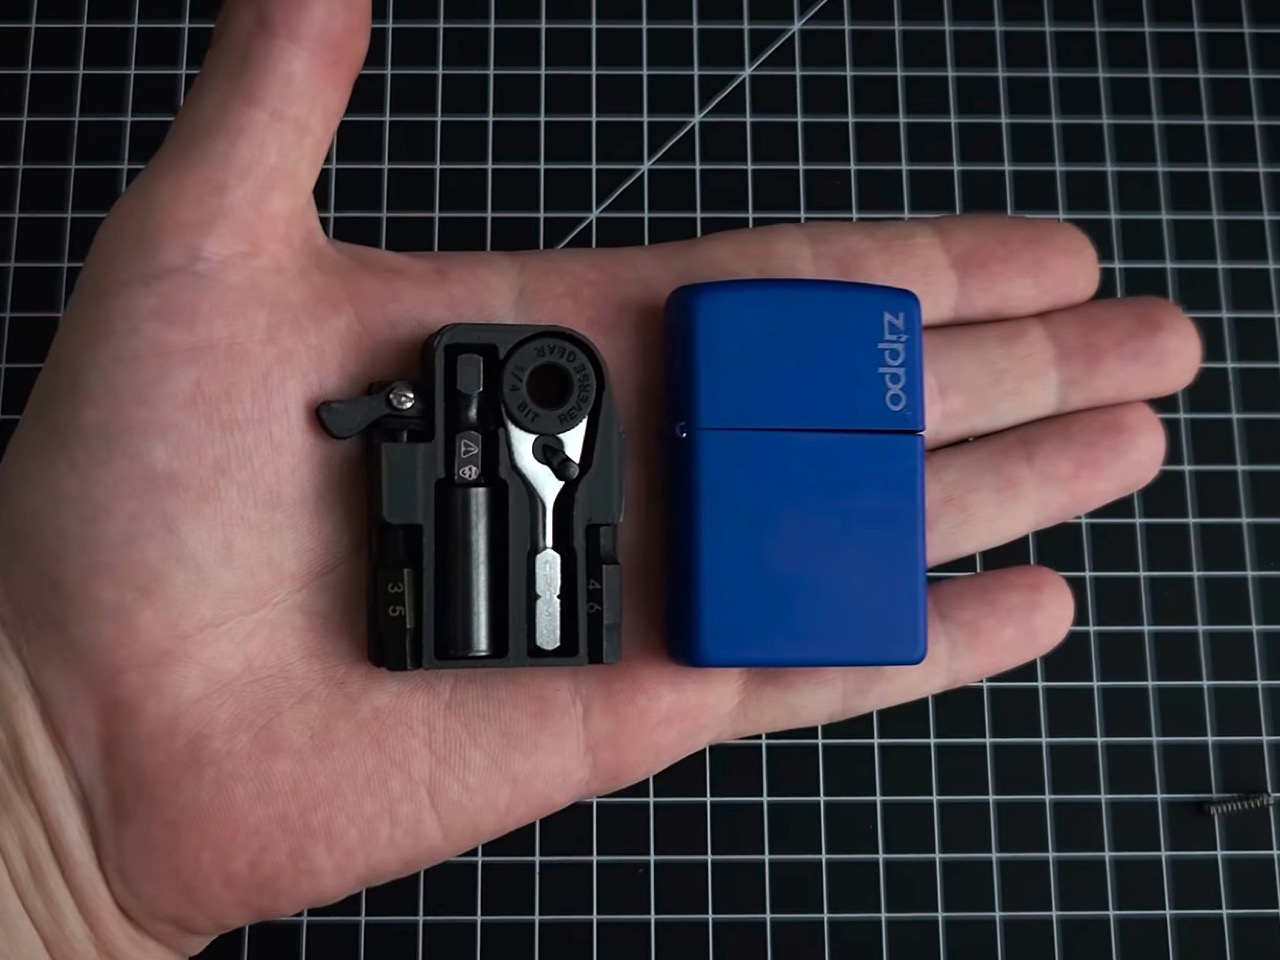
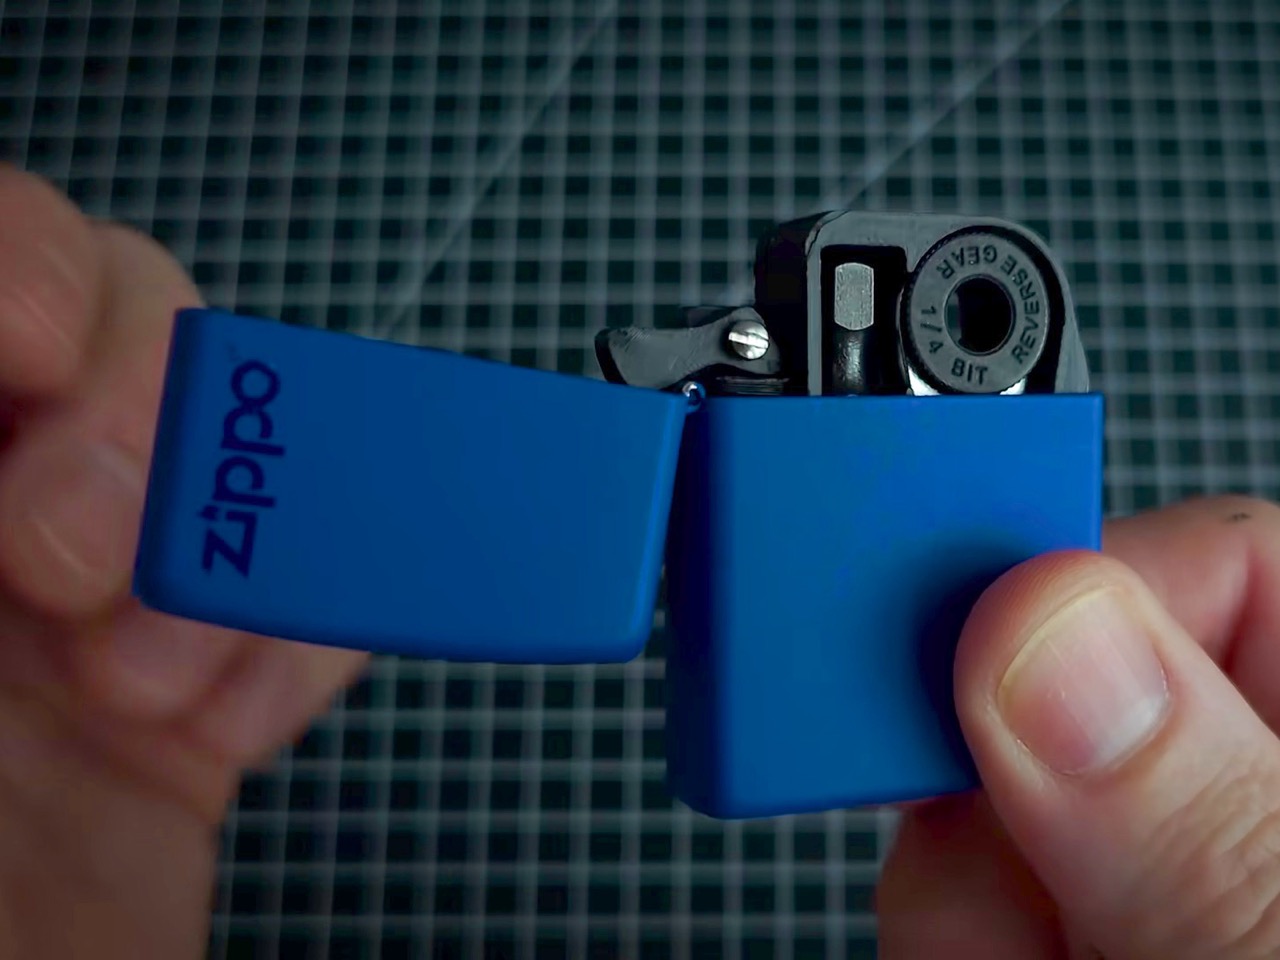
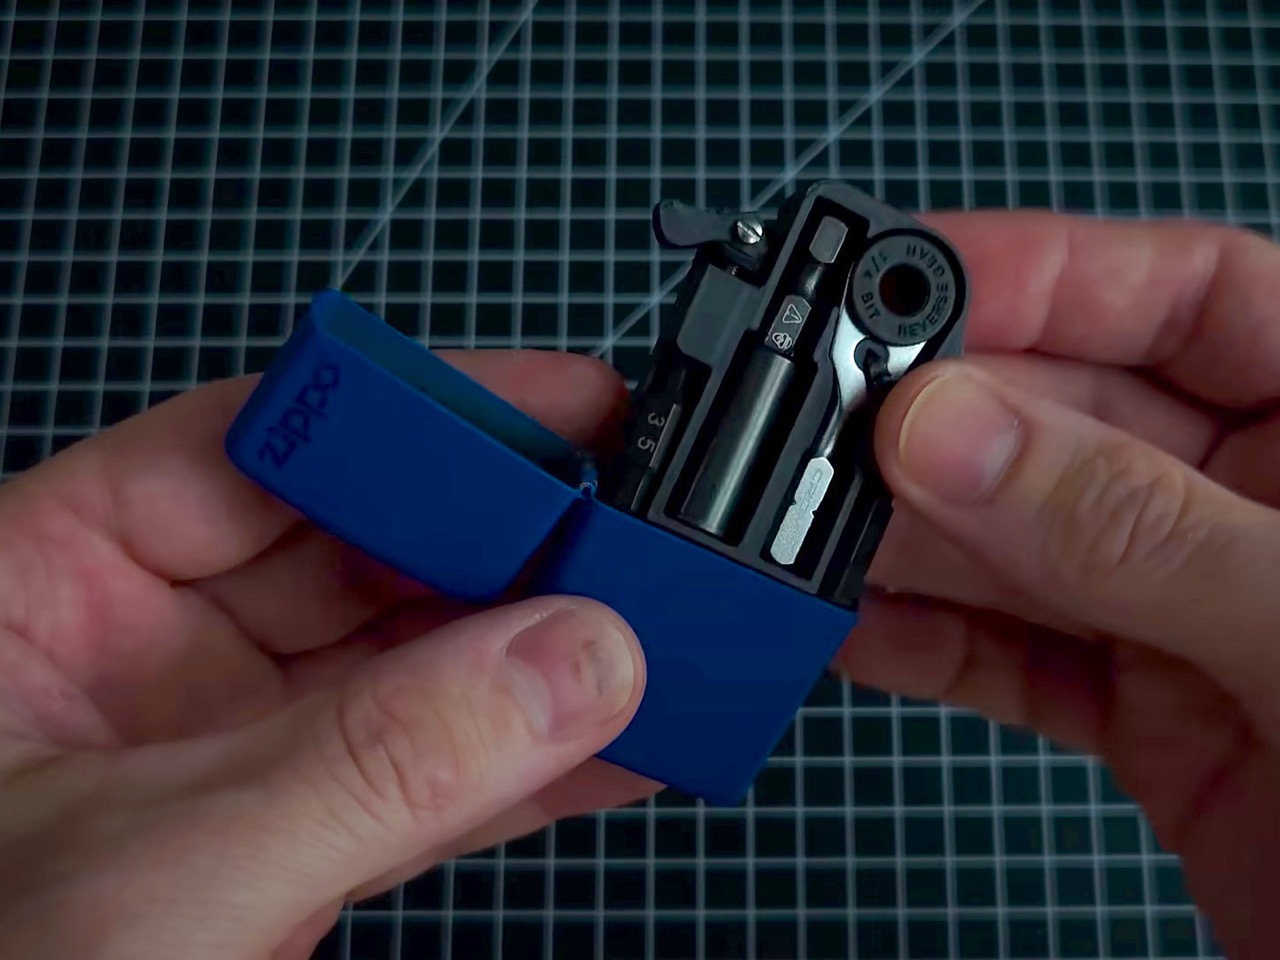
Closed, Tiny Tool Shop’s DIY toolkit is still a Zippo case. Open it, and a custom 3D-printed insert holds a Crom micro ratchet, two Steinwhale micro bits, and a Klein utility knife extension. The lighter insert has been removed, so this no longer doubles as a lighter. That constraint is part of the appeal: the maker uses an existing enclosure, with its hinged lid already solved, then designs the internal storage around a very specific selection of small tools.
The cleverest detail is retrieval. A spring salvaged from a Bic lighter helps push the ratchet through an opening in the case’s back, addressing the obvious problem of extracting something packed this tightly. Dedicated recesses organize the components instead of leaving them loose inside the shell. This is a maker project, not a ready-made Zippo product, and reproducing it means sourcing parts and making the insert. For someone drawn to mechanical projects, that assembly process is part of its attraction.
What we like
Reuses a familiar hinged enclosure with dedicated tool storage.
Spring-assisted retrieval addresses the difficulty of removing tightly packed components.
What we dislike
Requires DIY assembly and a custom printed insert.
Storage is tailored to the specified ratchet, extension, and bits.
2. CraftMaster EDC Utility Knife
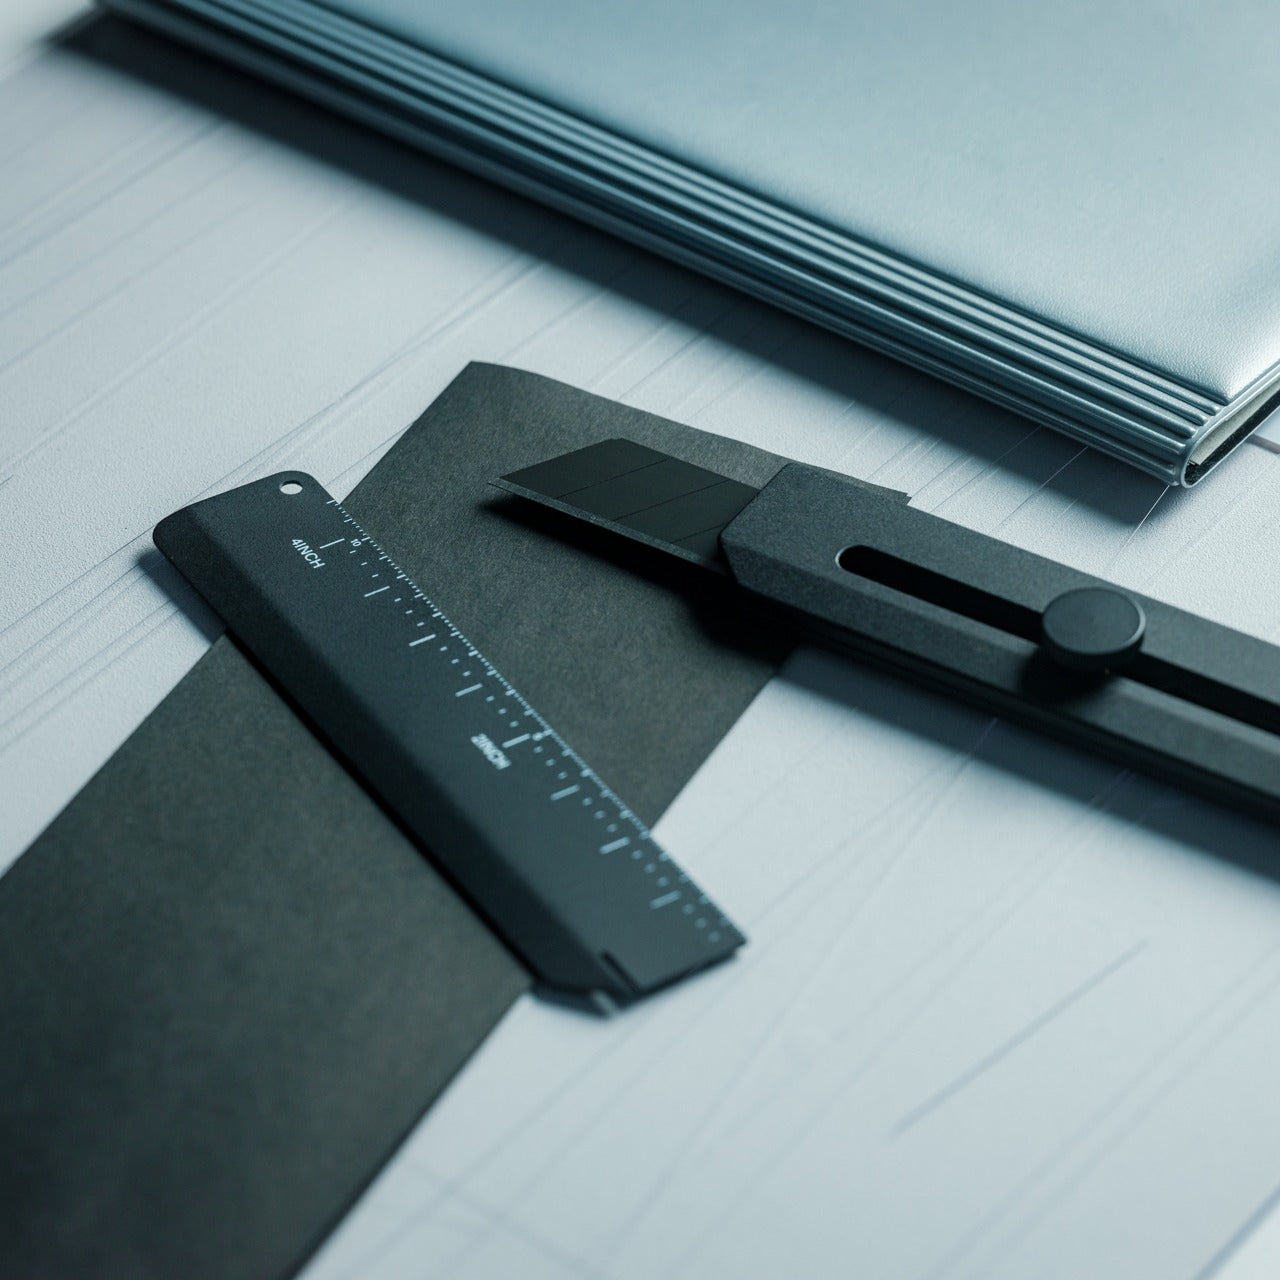
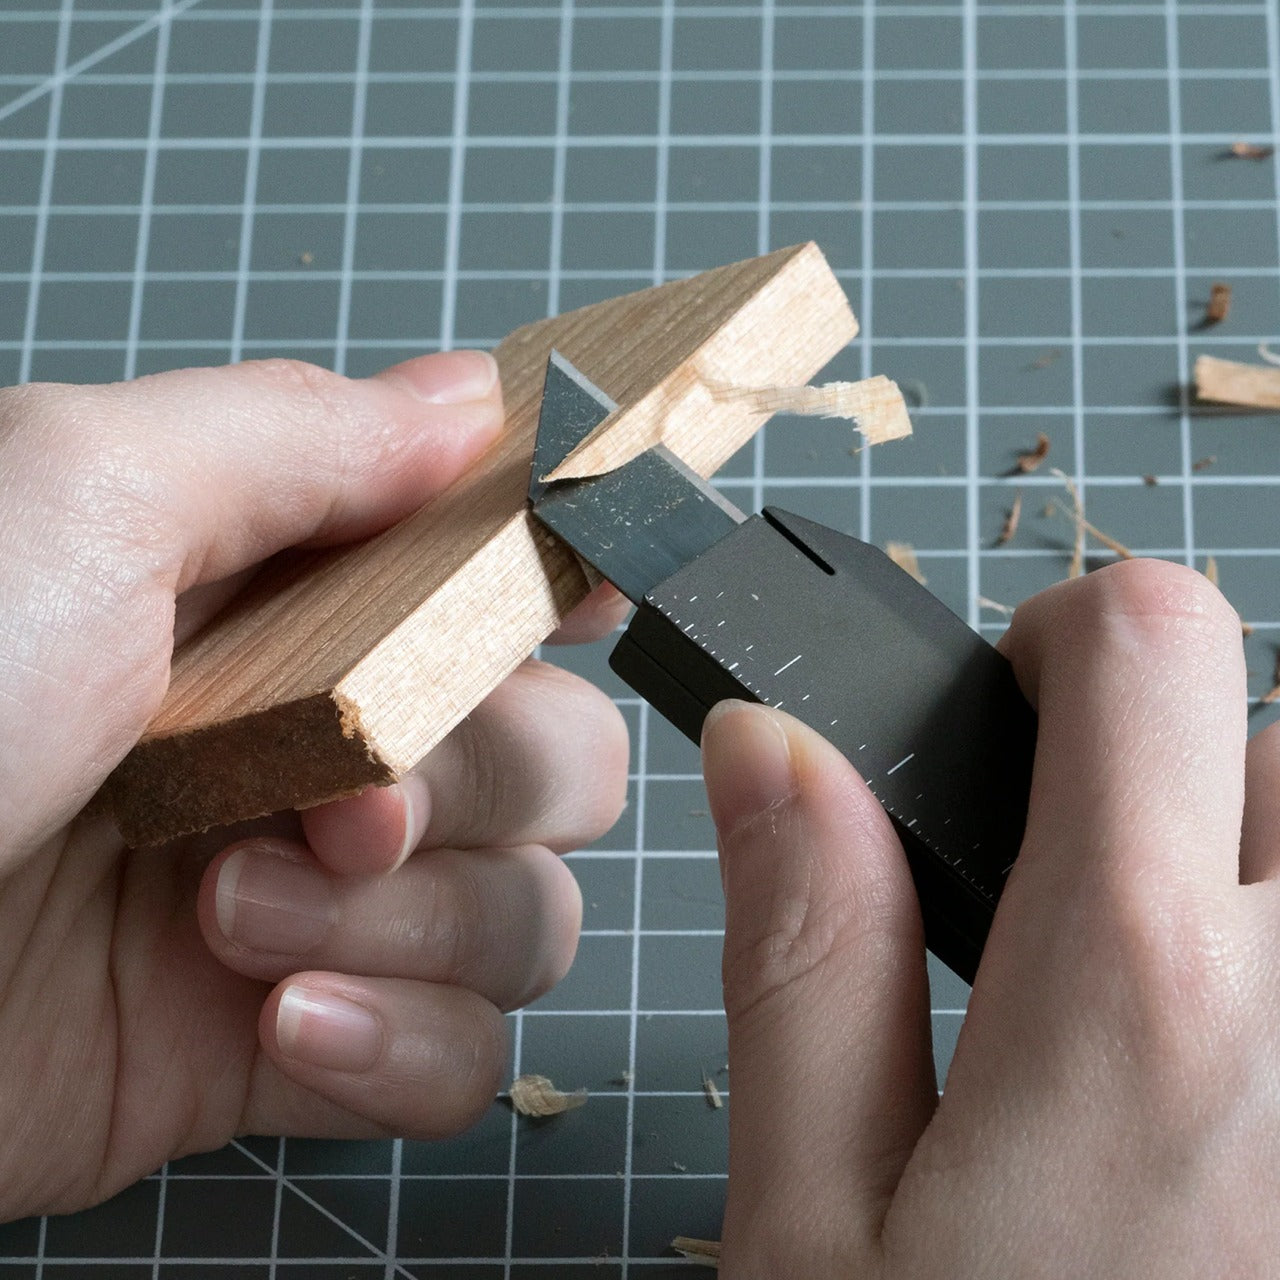
CraftMaster makes more sense when opening boxes and trimming materials account for most of your tool use. The utility knife pairs a metal body with a replaceable OLFA blade deployed using a rotating knob. At 4.72 inches long, the package stays compact, while a companion metal ruler docks magnetically against the back. Rather than hiding a blade among unrelated attachments, the design gives cutting and measuring the full object, with the ruler stored alongside the knife.
The ruler carries both metric and imperial markings, with a raised edge to help lift it from a flat surface. It also incorporates a blade breaker for removing dull segments, keeping a maintenance accessory within the same compact arrangement. That’s the interesting decision here: the extra features support the main task instead of chasing a larger function count. At $80, this is a deliberate upgrade to a basic cutter, and its appeal depends on how often you cut and measure.
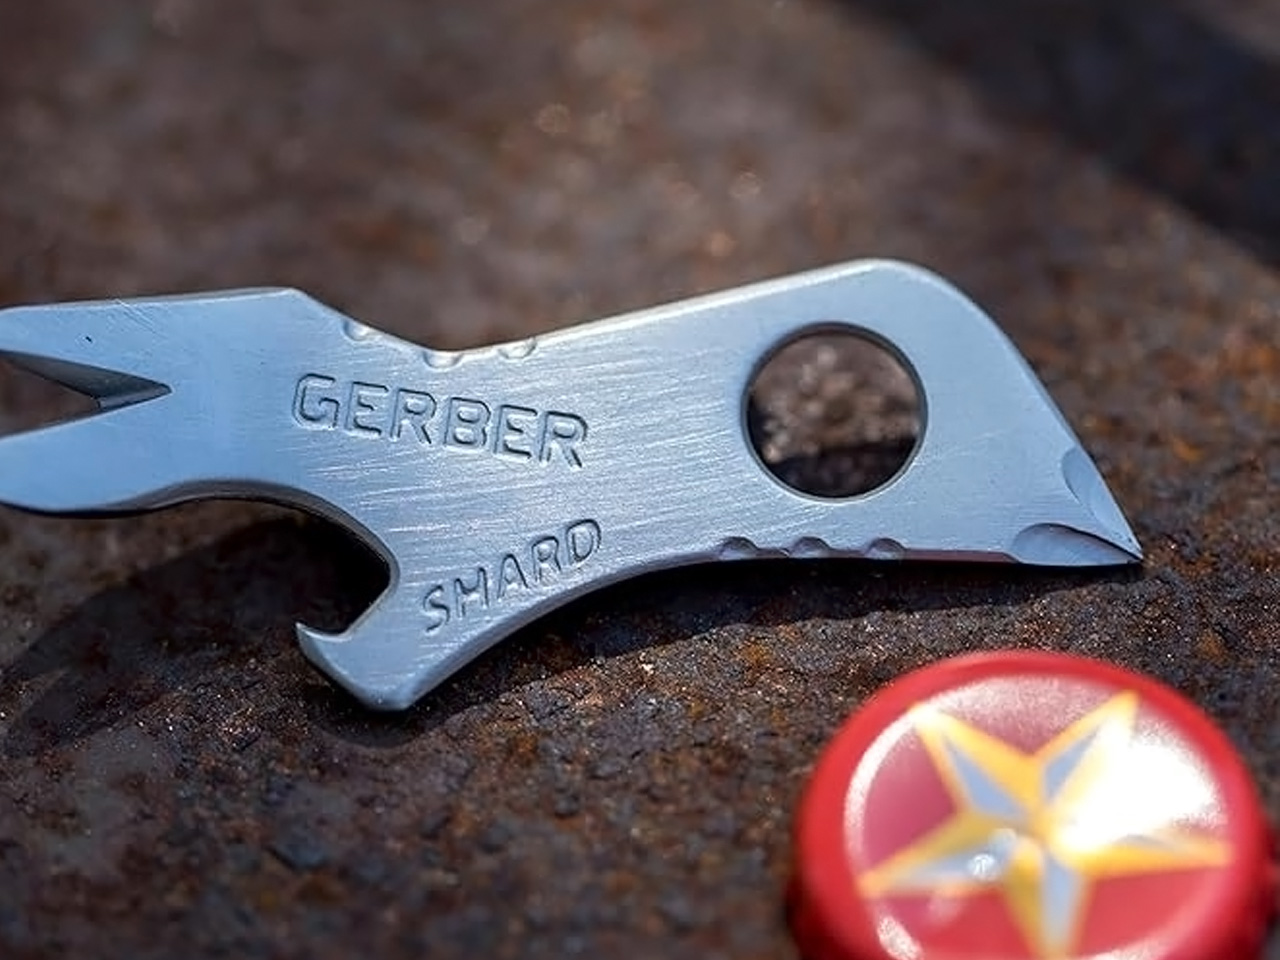
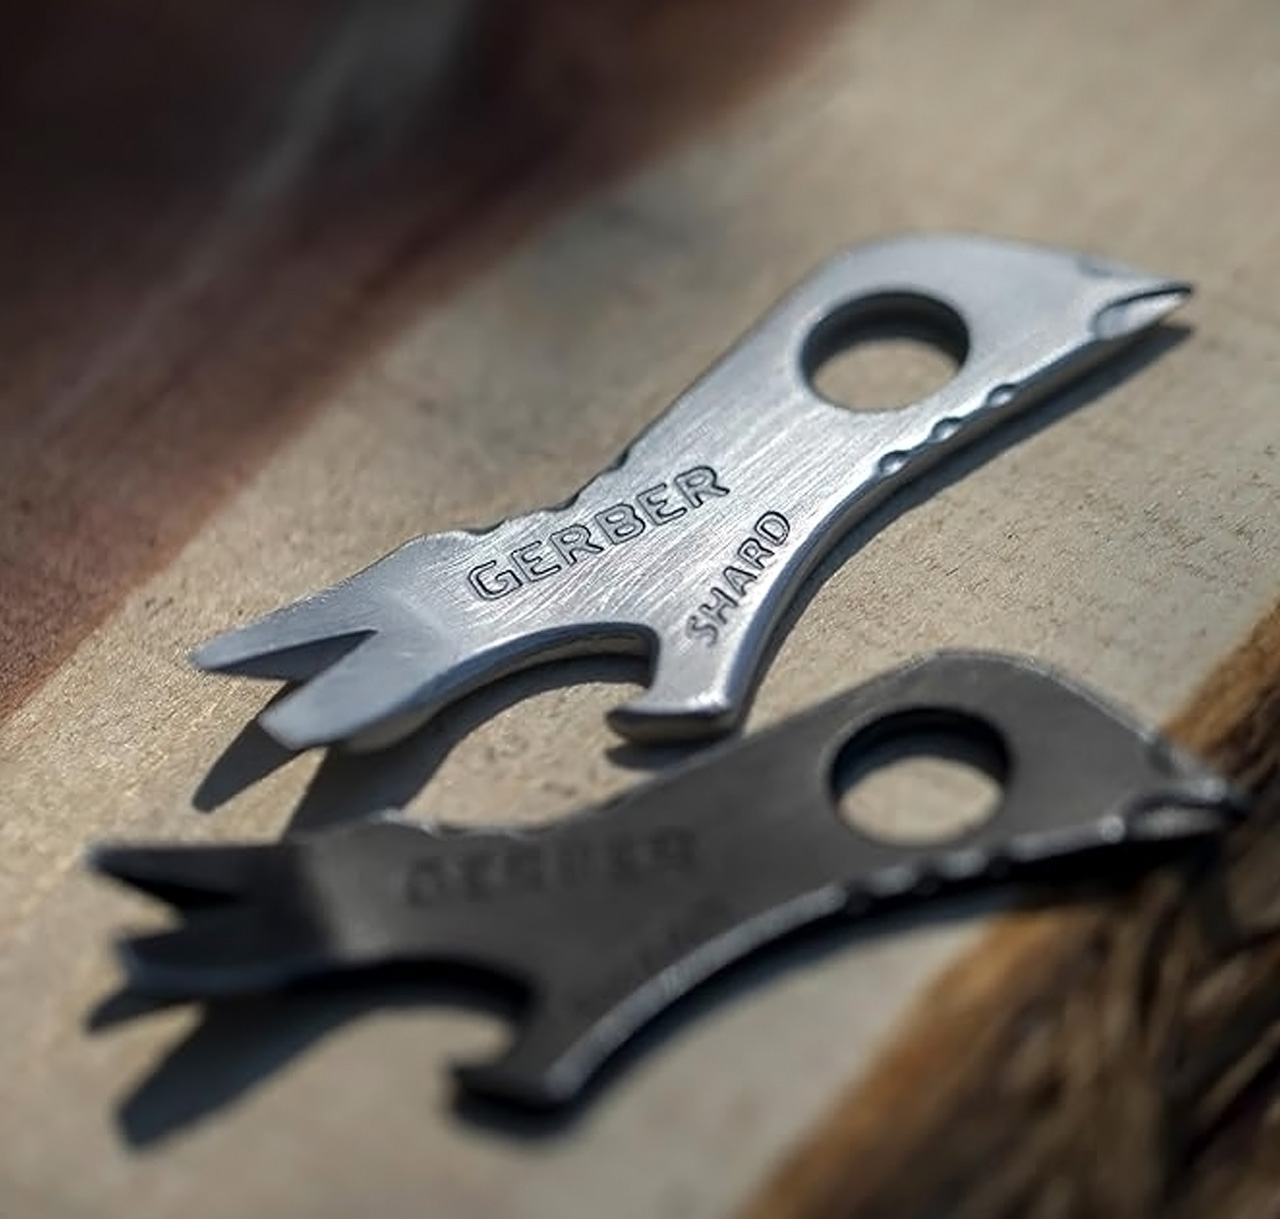
Gerber’s Shard takes the opposite approach to the Zippo build: there’s nothing to unpack. This stainless steel keychain tool integrates a pry bar, two flathead drivers, a cross driver, a wire stripper, and a bottle opener into its fixed shape. A hole attaches it to your keys, so it doesn’t demand a separate pouch. The appeal is straightforward. For occasional small adjustments or light prying, you can reach for a tool without unfolding an entire set of handles and attachments.
The design asks you to accept a small gripping surface in exchange for less hardware. That’s a reasonable bargain for a backup, but not a reason to retire proper screwdrivers. There’s no blade or pair of pliers here, and the integrated tips aren’t interchangeable. Gerber specifies a titanium nitride coating for corrosion resistance, although that’s a protective treatment rather than a claim that the tool is titanium. Its distinction is how little mechanism it needs to do its limited jobs.
What we like
Integrated tools need no unfolding or assembly.
Keyring attachment avoids a separate carrying case.
Small gripping area limits its role in demanding jobs.
4. Streamlight Wedge SL
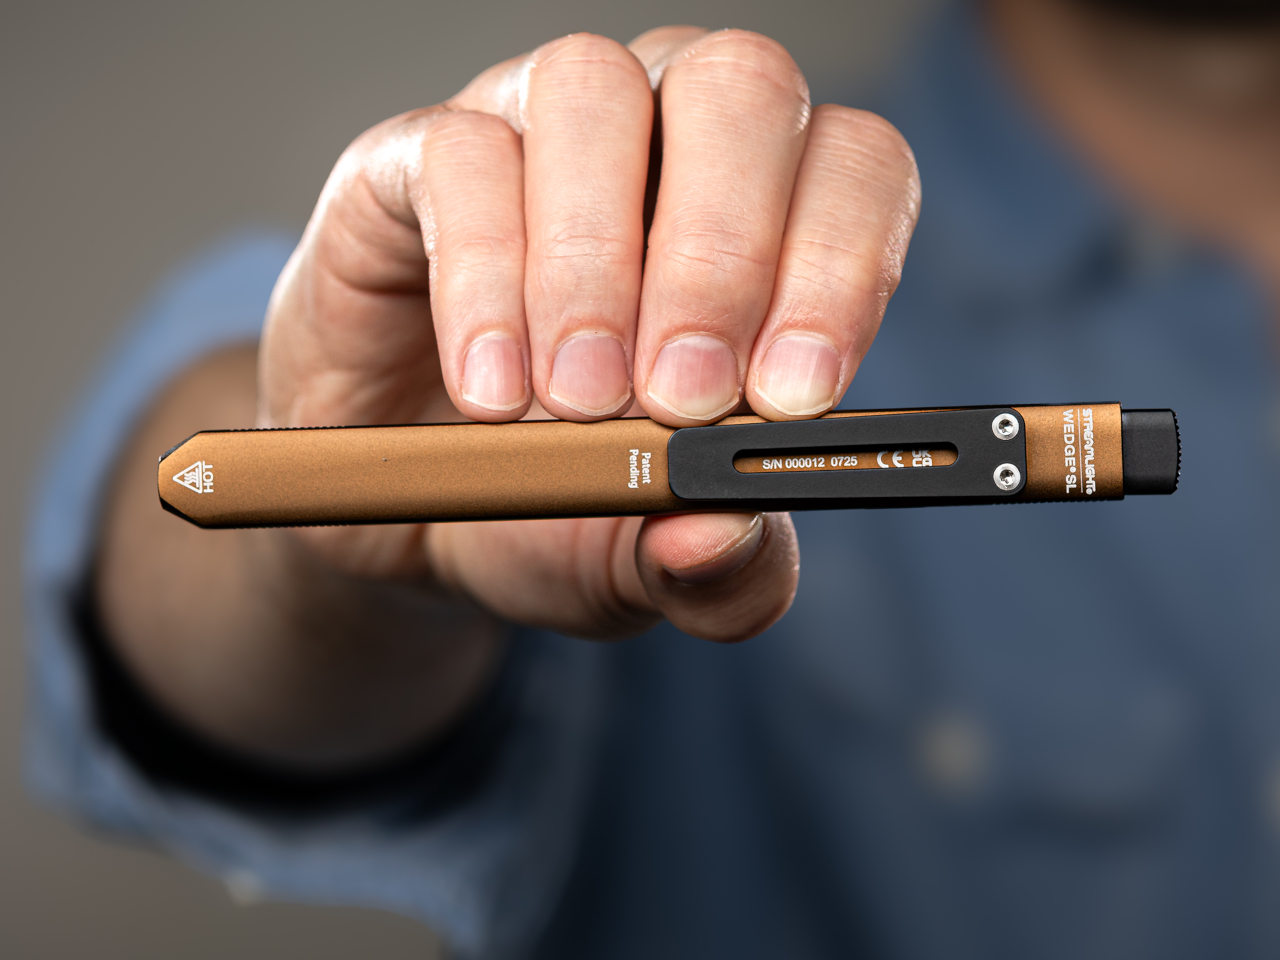
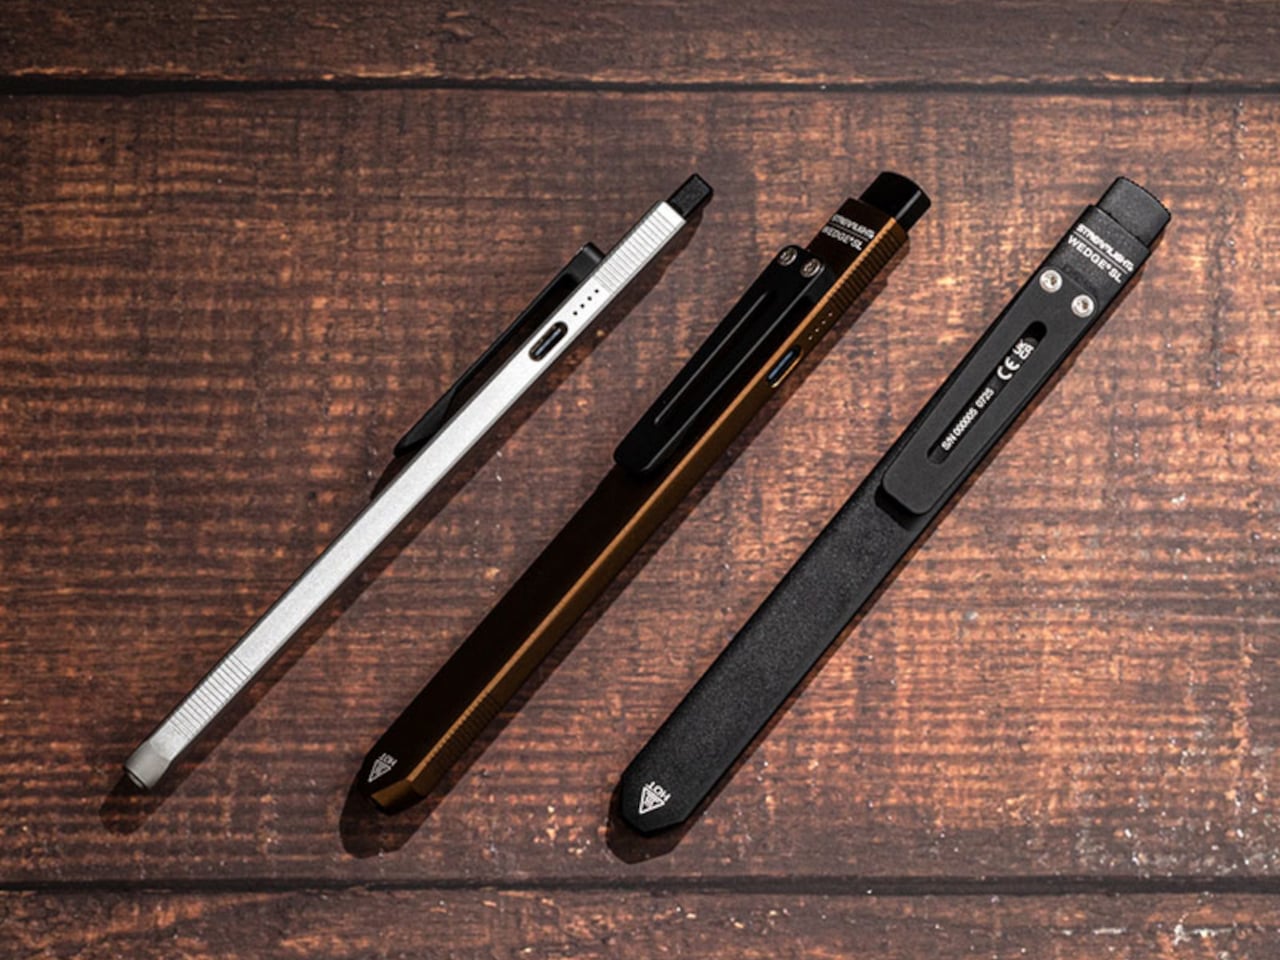
A flashlight earns its place here because seeing the screw can matter as much as having the right bit. Streamlight’s Wedge SL uses a flat aluminum body rather than a cylindrical tube, measuring 0.28 inches thick, or 0.41 inches with its pocket clip. It weighs 1.14 ounces and measures 5.65 inches long. Those proportions explain the design: this is a slim inspection light for a pocket edge or tool pouch, with dimensions that prioritize a thin profile over outright miniaturization.
Streamlight rates continuous output at 100 lumens on high and 50 on low, with a temporary mode reaching 500 lumens. Keeping those figures distinct matters more than leading with the biggest number. A tail switch handles operation, while USB-C charging and a user-replaceable battery support continued use. The manufacturer quotes 1.75 hours on high, so this is worth choosing around short inspections rather than assuming an entire evening at full output. That runtime deserves as much attention as the brightness.
What we like
Flat body measures 0.41 inches thick, including the clip.
USB-C charging and a user-replaceable battery.
What we dislike
The 500-lumen output is temporary, not continuous.
Rated runtime on high is only 1.75 hours.
5. Eiger 8-in-1 Scissors
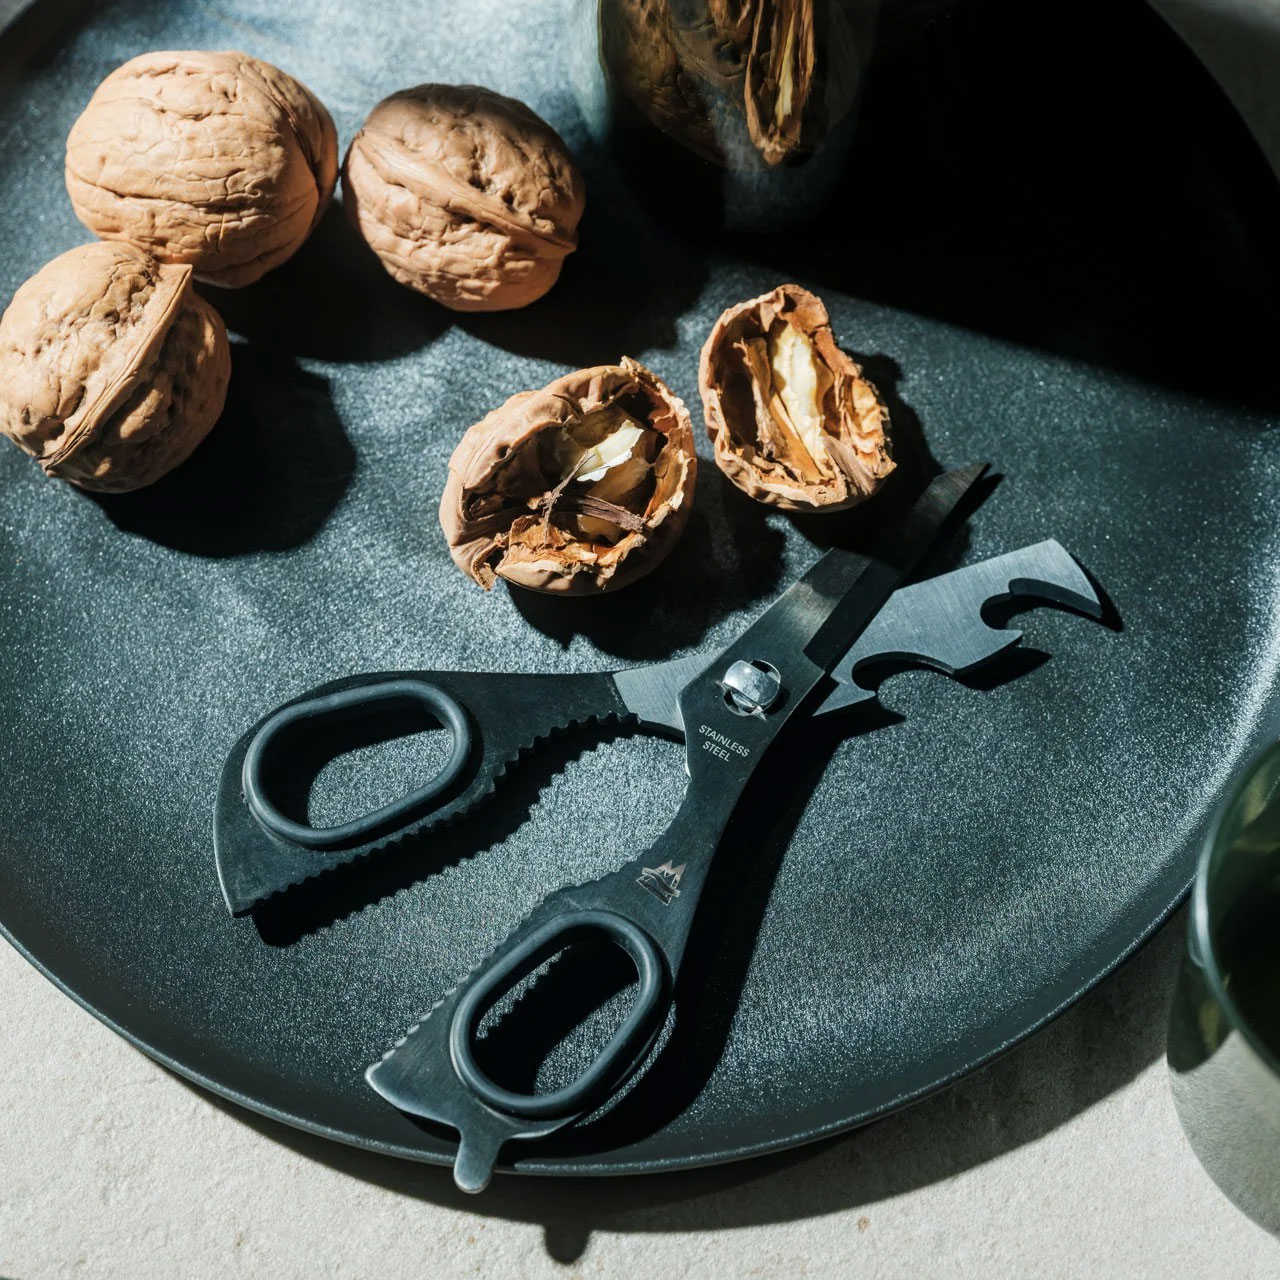
EigerTool starts with the scissors, which is a sensible choice if most of your everyday cutting involves packaging, string, or labels. Made in Sanjo, Japan, the Eiger 8-in-1 Scissors use SUS420J2 stainless steel and measure 5.12 inches long, weighing 1.87 ounces without the carrying case. The handles and blades incorporate bottle, can, and screw-cap openers alongside other functions. Instead of burying small scissors inside a conventional folding tool, Eiger makes the familiar cutting action the center of the whole design.
A leather case covers the tool for carrying, and the included Nite Ize carabiner offers a bag attachment option. That matters because a tool this long still needs room, even if the scissors themselves weigh little. The case belongs in the size calculation, too: the listed 53 grams refers to the scissors, not everything you’ll carry when they’re protected and clipped on.
Case weight isn’t included in the 53g specification.
Choose the Task Before the Tool
Before adding another tool, think about the last few times you actually needed one away from home. Frequent deliveries suggest carrying a dedicated package cutter. Loose fasteners suggest a driver. Dark cupboards suggest a light. That sounds obvious, but it’s an effective way to avoid choosing by function count alone. Your pocket has limited space; the useful question is which recurring inconvenience deserves a permanent place in it each day.
There’s also permission here to leave capabilities behind. If pliers rarely solve a problem for you, their absence isn’t automatically a flaw. If you need them regularly, none of these smaller alternatives make that requirement disappear. Compact carry works best as an honest edit, including the case, clip, or loose components that come along. The goal is a tool you’ll willingly bring, without slowly rebuilding the toolbox inside your pants.