A beginner’s guide to smart sous vide

Cooking via “sous vide” might sound complicated and intimidating, but it’s actually a lot easier than you might think. French for “under vacuum,” “sous vide” simply translates to immersing vacuum-sealed food in a temperature-controlled water bath until the food is cooked to your liking. Instead of worrying about whether a steak is medium rare or whether that chicken breast will be dry, you can just dial in your desired temperature, wait a few hours, and you’ll get perfect results without the guesswork.

Though sous vide cooking was once the province of professional cooks with expensive equipment, affordable options are now widely available. Wand-like immersion circulators have made sous vide cooking accessible to home chefs for several years now. And, like a lot of kitchen tools now, many sous vide devices even have companion apps and WiFi connectivity that make the process even more automated. If you’re curious about giving sous vide cooking a go, we’ll walk you through the process of choosing the right machine for you and share some of the tips and tricks we’ve learned through our own experiments.

How to pick a smart sous vide machine

If you’re going to choose a sous vide machine, we definitely recommend getting a smart one, which means it either has Bluetooth or WiFi capabilities (or both). That’s because this often adds a whole lot more features than you might otherwise have. We suggest getting models with a companion app that will help you set up and monitor your sous vide temperature remotely. Bluetooth-only models work when you're within 30 to 40 feet of the cooker, while those with WiFi let you supervise your food from anywhere in your home, or as long as you're on the same network. We also tend to prefer apps that come with recipes already on it, especially if you’re new to sous vide cooking and need some help getting started.

Anova

Other factors to consider

At a minimum, the other items you need to cook sous vide are a large metal pot (big enough to fill with water) and zipper-lock freezer bags to put the food in. Alternatively, you can use reusable silicone bags such as these from Stasher. Rather than using a vacuum sealer to get rid of air, you would use the water displacement method: Immerse the bagged food in the water while partially unsealed, and water pressure will push the air through the opening. Once everything is mostly underwater, you can seal the bag and it'll stay submerged.

If it still floats, you can stick one or two spoons in the bag, and that will hopefully weigh things down. (J. Kenji Lopez-Alt from Serious Eats also suggests using a large binder clip attached to the bottom of the bag along with a heavy spoon.) If you're concerned about water getting in the bag, you can attach the bag tops to the pot with binder clips, thus keeping the bag upright.

If you're really serious about sous vide, you might want to invest in some specialty equipment. Instead of pots, for example, you could opt for large restaurant-grade plastic containers by Cambro or Rubbermaid. Not only is plastic a better insulator than metal, but there's generally more space for more food, which is handy when you're cooking for a crowd.

Whether you use a pot or a plastic container, it's best to cover the vessel with plastic wrap when cooking for long periods, to keep evaporation to a minimum. Some companies, like Chefsteps, offer custom silicone pot lids that are made specially to accommodate their sous vide cookers. Alternatively, Lopez-Alt offers a much cheaper and more ingenious solution: cover your water in ping pong balls. They'll slow down evaporation.

Rubbermaid

Additionally, while zipper-lock bags work well for most tasks, it's still not a bad idea to get a vacuum sealer along with thicker plastic bags designed specifically for sous vide. For one, this lets you sous vide vegetables or braised meats, which typically require a higher temperature. (Zipper-lock bag seams might fail when it's that hot.) This also lets you freeze a bunch of food, vacuum seal them and sous vide packets straight from the freezer, which is convenient for batch cooking.

You likely already have this at your disposal, but another handy tool is a good skillet to sear your meat. That sous vide device might be able to cook your steak to medium rare, but it won't be able to brown it. A cast iron skillet, on the other hand, will. You could also consider a torch like the Bernzomatic TS8000, and we've seen others use a Searzall — but a cast iron skillet is far more affordable than either option. Of course, if you have a grill, you can use that too.

There are other miscellaneous items that could prove useful. Lopez-Alt likes having a pot lid organizer immersed in the container to help separate several submerged bags. If you want to make custard, yogurt or breakfast cups with your sous vide cooker, you should get yourself some mason jars too.

One more indispensable item worth considering: a trivet to rest your water vessel on so you don't destroy your countertop.

Sous vide recipe resources

Since affordable sous vide cookers have been in the market for a few years now, there’s no shortage of recipes and guidelines online to help you figure out what to do with your newfangled kitchen gadget. The links below are some of our favorites, though bear in mind that a lot of this is based on personal taste. Your mileage may vary.

Anova

It only makes sense that the maker of one of the most popular sous vide machines also has a deep library of sous vide recipes. If you're ever at a loss as to what to make via sous vide, simply peek at this website, where you can search for recipes from professionals and amateurs alike.

Serious Eats

We've mentioned it several times here already in this guide, but Serious Eats truly is a remarkably useful resource for all things sous vide. Its guide to sous vide steak is a favorite among Engadget staffers, as is its take on slow-cooked sous-vide style eggs, which results in some of the best eggs I've ever had.

Chefsteps

Years before making the Joule, Chefsteps made a name for itself as a cooking school with a heavy emphasis on food science, tech and molecular gastronomy. That's probably why the sous vide recipes from Chefsteps are some of the more creative ones we've seen. One recipe, for example, teaches you how to make that perfect chicken breast along with the perfect accompaniment for said chicken breast — perhaps a crunchy apple fennel salad and a buttery carrot puree. Other favorite recipes include wonderfully tender salmon filets, juicy pork chops and Chefsteps' own interpretation of the "sous vide egg bites" you sometimes find in certain Starbucks shops.

Sous Vide at Home

This is actually a cookbook from the people behind the Nomiku WiFi sous vide machine (which has since been discontinued), but the recipes in it will work with any sous vide device. Not only does it have beautiful photographs, but it also offers fantastic recipes like jerk chicken wings, duck confit and chocolate pots du creme.

Other noteworthy recipes:

Sous vide alternatives

Instant Pot Smart WiFi
Instant Pot / Best Buy

Aside from immersion circulators like the ones mentioned here, you could also opt for multi-purpose appliances that offer sous vide-like functions. Several Instant Pots, for example, offer such a feature. Unfortunately, however, they do not circulate the water like the aforementioned immersion circulators, and the temperatures aren’t quite as precise (which is a definite downside if you need something cooked to a specific temperature). But if you don’t really care about that, or you just want to dabble occasionally in sous vide, this might be a viable option.

If you’re dead set on a multi-tasking appliance and you have the money to spend, consider the Anova Precision Oven. Thanks to its use of steam, you can indeed use it to cook foods via sous vide but without the need for plastic bags. It also uses a fan to circulate the moist air around the food and a probe thermometer helps keep foods at a precise temperature. And, of course, the Precision Oven can be used as a regular oven as well, and is great for baking breads and bagels. It is, however, quite expensive at $700 and takes up a lot of counter space.

Images: Will Lipman for Engadget (Anova / holiday light background)

This article originally appeared on Engadget at https://www.engadget.com/smart-sous-vide-guide-151821790.html?src=rss

What to buy if you want to start producing music at home

These days it’s not necessary to go to a giant studio with overpriced, pro-grade gear to record a Grammy-winning record. You can do it right from the comfort of your own bedroom in fact, using tools priced for even the most casual of hobbyists. It's not news that the tools of creation or the avenues for distributing art are accessible to more people than ever. But the cultural institutions that have dominated popular music for so long can no longer ignore the bedroom producer or budding Soundcloud star.

Maybe you've been inspired to build your own home recording studio. And maybe, you're not quite sure where to start. Well, an audio interface, a good mic and a decent set of headphones will get you pretty far. But the first thing you'll need is probably staring you right in the face: a computer.

Computer and a DAW

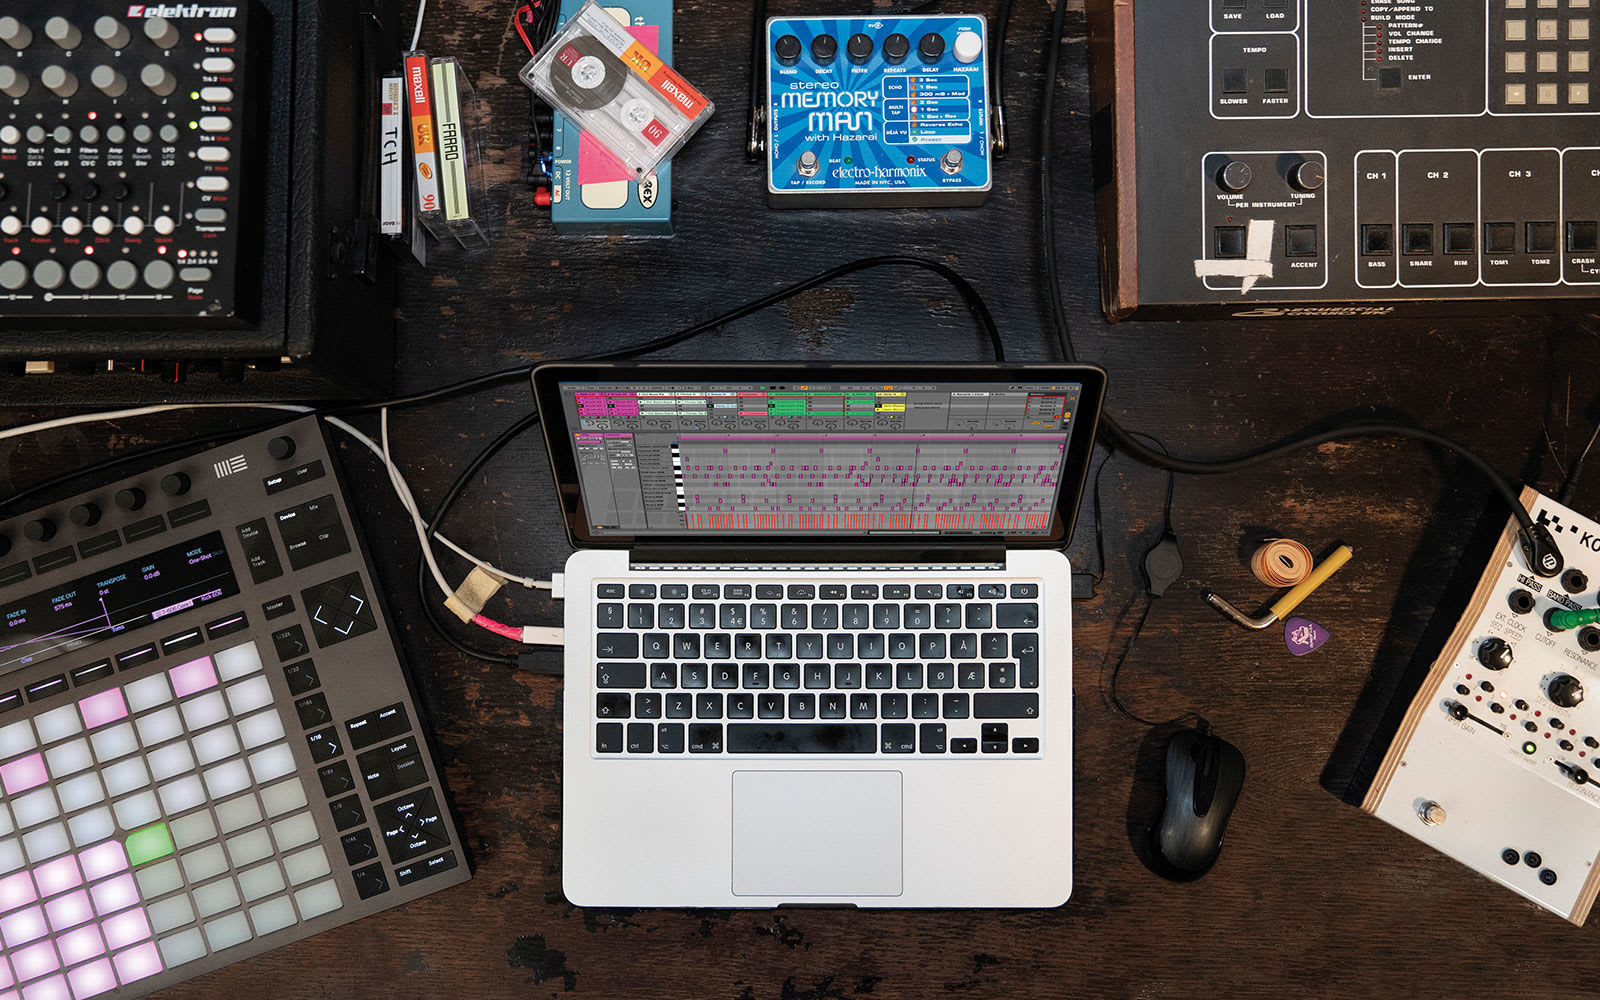
An overhead view of Ableton Live 10 on a laptop surrounded by home studio gear.
Ableton

Justin DeLay, Director of Product and Category Marketing at Reverb, drives home just how important the computer is: "You can strip away everything else and as long as you have a computer you can still create music," he told me. He suggests you "spend the money on a good computer and get other gear — such as audio interfaces, mics, headphones, etc. — used or at reasonable price points."

But, truthfully, you can do quite a lot with whatever computer you have on hand. Joe Pecora, the engineer and producer at Red Room Studio, says your set up "could be as simple as an iPhone/iPad with Garage band." (I know someone who recorded an entire album this way.) While he agrees that the most important part is your computer, he argues it doesn't have to be super powerful. It doesn't even have to be a desktop. JDilla famously created many of his beats on a Roland SP303, and you can basically recreate that experience with an iPad and the $4 Koala Sampler for iOS. And don't forget that Gorillaz recorded an entire album on an iPad.

Which leads us to the next thing you'll need: a DAW, or digital audio workstation. If you're a Mac user, then you're lucky enough to have access to Garage Band, a surprisingly capable free option. And upgrading to Logic Pro X is only a $200 investment. If you're on Windows (or just don't like Logic), I often recommend Ableton Live (starting at $99). But honestly there are plenty of great options out there, like FL Studio, BitWig and Cubase all of which start at $99. And often, stripped down versions come free as part of a software bundle when you buy music-making hardware like MIDI controllers and audio interfaces.

Assuming you already have a computer and you just need the accessories to get recording, you can pick up everything you need for under $500 new. But, if you’re patient, you could build a well equipped bedroom studio with used gear for as little as $250.

MIDI controller

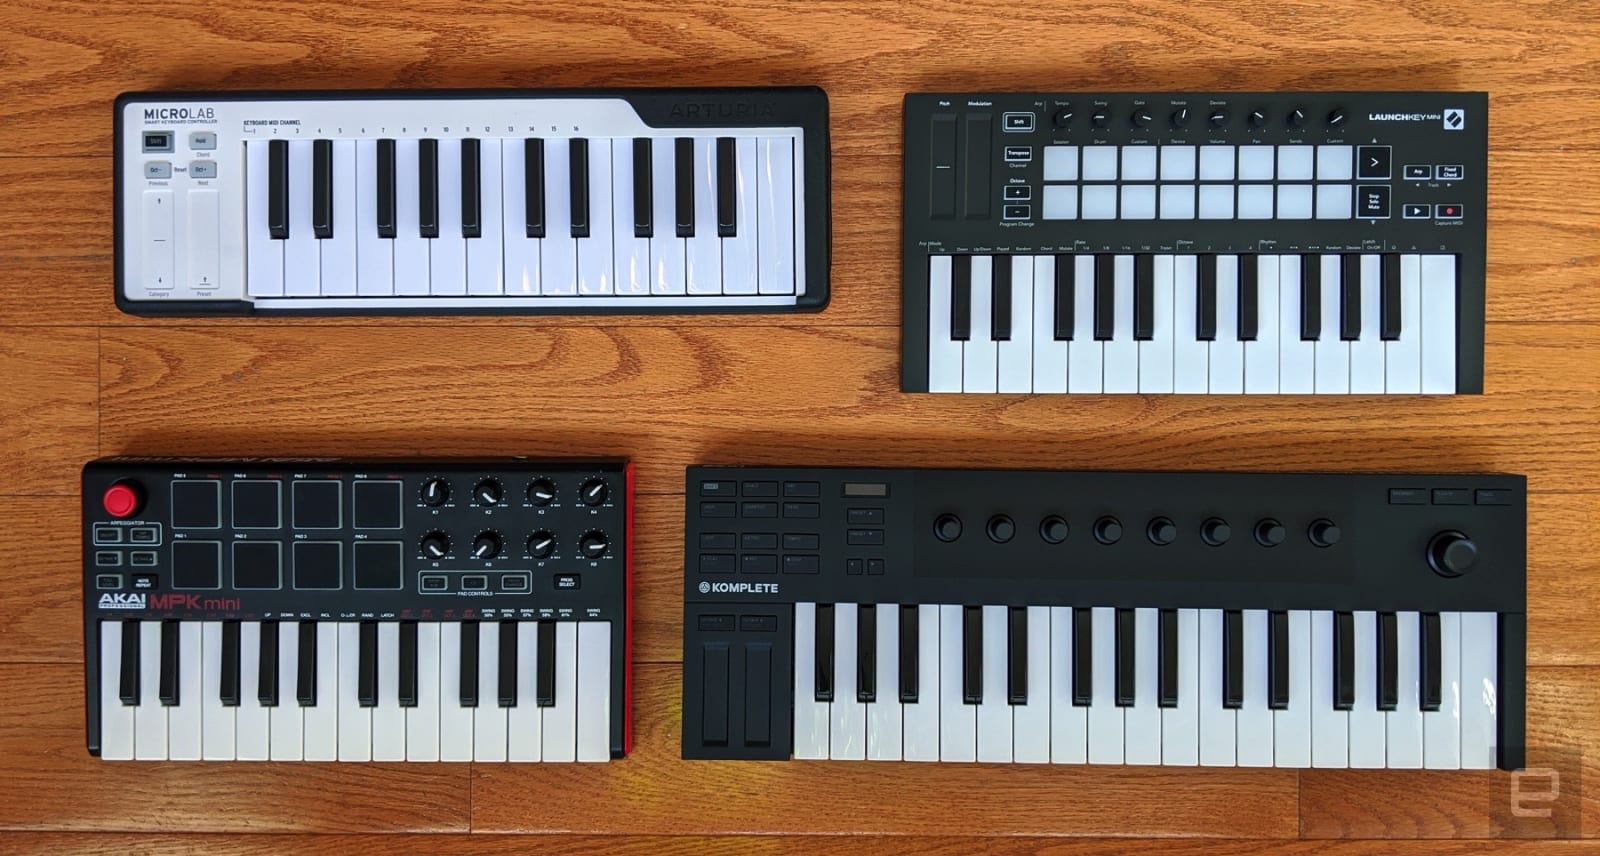
An overhead view of four different midi keyboards on a wooden desktop.
Engadget

Speaking of which, one of the first additions to your studio should be a MIDI controller. DeLay says this is a piece of gear often overlooked by beginners. "It's not just for playing keyboard sounds," he explained, "it can be used to write drums and percussion, to control mixes and more. It's the creative interface of music production, and you don't have to play the piano in order to harness its power."

We've covered plenty of affordable and portable options before. But if you don't plan to make music on the go, I can't recommend the Arturia MiniLab 3 enough. It punches well above its weight, and even the pros love this thing. And if you have the space, it's not much more to upgrade to something like the Keylab Essential 49 ($269) or Novation Launchkey 49 ($229), which will give you a lot more controls to play with.

Microphone

An Audio-Technica AT2020 condenser mic is on a stand above a coffee table with a laptop, with a leather couch in the background.
Audio-Technica

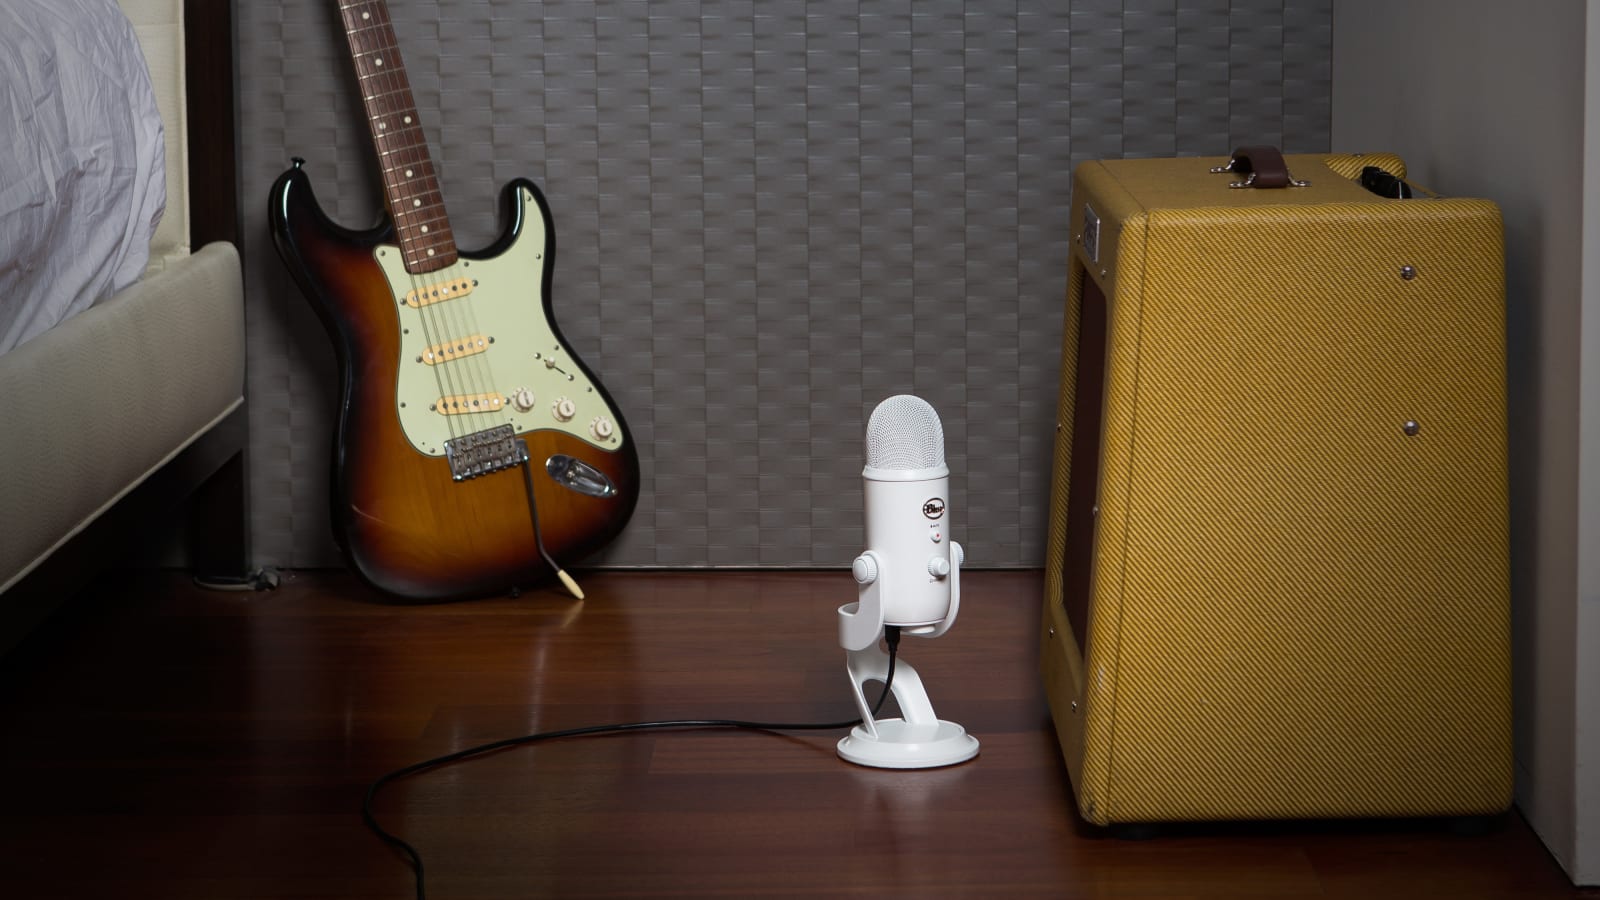
Unfortunately there's no gear that will magically turn you into a breathy pop goddess, but a decent mic and audio interface can at least help you sound your best. Now, you could get a USB microphone, like Blue Microphones’ $130 Yeti, and it will certainly get the job done. Heck, that album I mentioned earlier was recorded using the wired headset that came with the iPhone.

But, honestly, your better bet is to get a regular XLR mic and an audio interface. Pecora specifically warns against splurging too much here. "People will look at their favorite artist and see that they use a certain mic or preamp or plugin and want to use the same thing thinking it will get them the same sound." On early singles like "Ocean Eyes" Billie Eilish used an Audio-Technica AT2020 condenser mic, which costs just $100. And I’ve stuck almost exclusively with cheap Shure SM58s and 57s ($100 new, $50-$75 used) whether I was recording demos with my band in college or voice over for review videos at Engadget.

If you fancy yourself a future pop sensation and want to make sure your vocals are the star of the show, you could consider using a significant chunk of your budget on something like the Rode NT1-A ($229) or Shure SM7B ($390). You will get better results with more flexibility for post production, but you can clearly get excellent results with more affordable options.

Audio interface

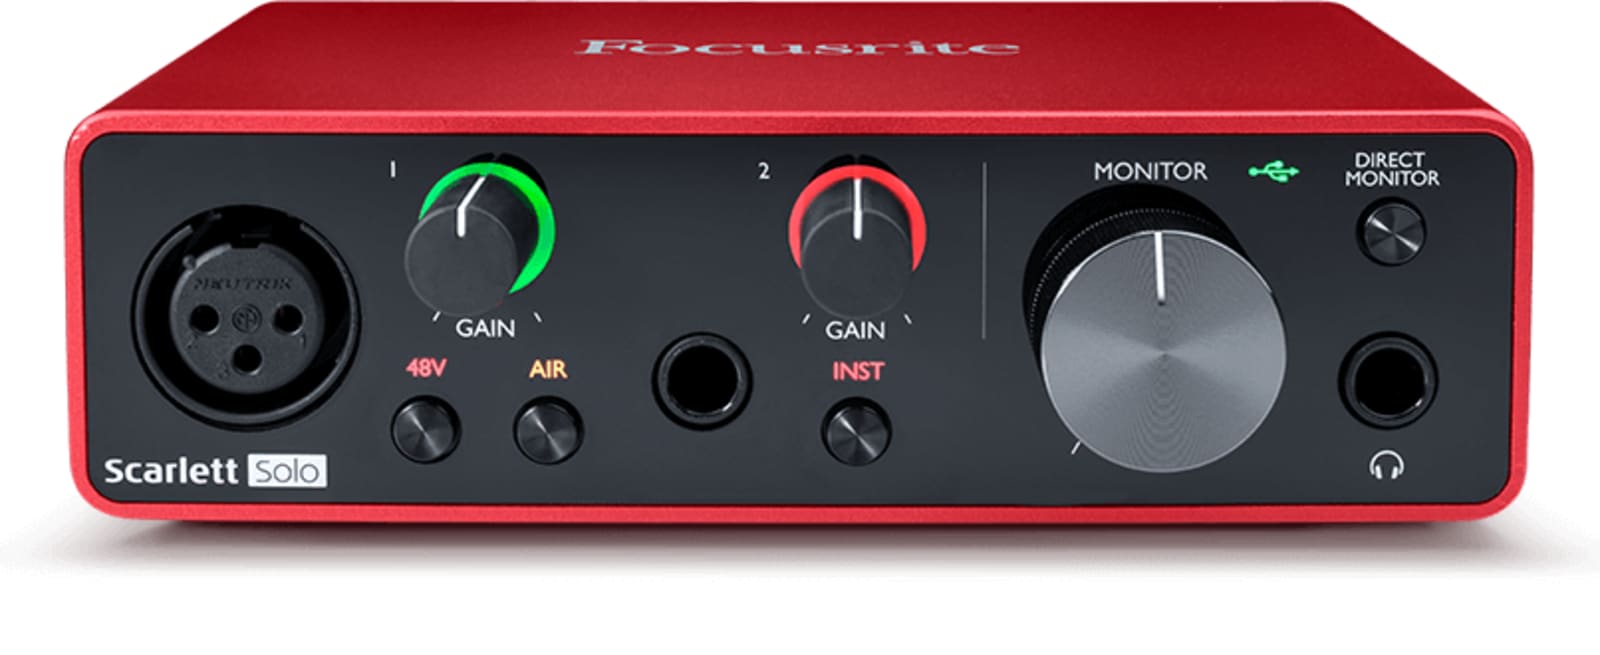
Focusrite Scarlett Solo
Scarlett

As for the interface, there are tons of great options out there. Companies like Focusrite, Arturia and Tascam make excellent ones. But our new favorites in the budget interface space are Universal Audio’s Volt series. If your budget allows for it we strongly recommend the $299 Volt 276. Though, the $189 Volt 2 is also excellent, it just doesn’t standout from the crowd quite as much.

If you’re trying to save a few bucks, it's hard to beat the Scarlett series from Focusrite (just make sure to get the second- or third-gen models). You can get the latest Scarlett 2i2 for around $130 used, but it's just $180 new (and includes a huge bundle of very useful software).

The reason to opt for an audio interface instead of a simple USB mic is because it offers you a lot more flexibility and room to grow. For one, it offloads a lot of the audio processing from the CPU. Second, it will allow you to connect not just mics (and swap in different ones for different purposes), but also instruments, turntables or anything with an audio-out jack. An audio interface is also necessary if you plan to connect a pair of studio monitors.

Studio monitors and headphones

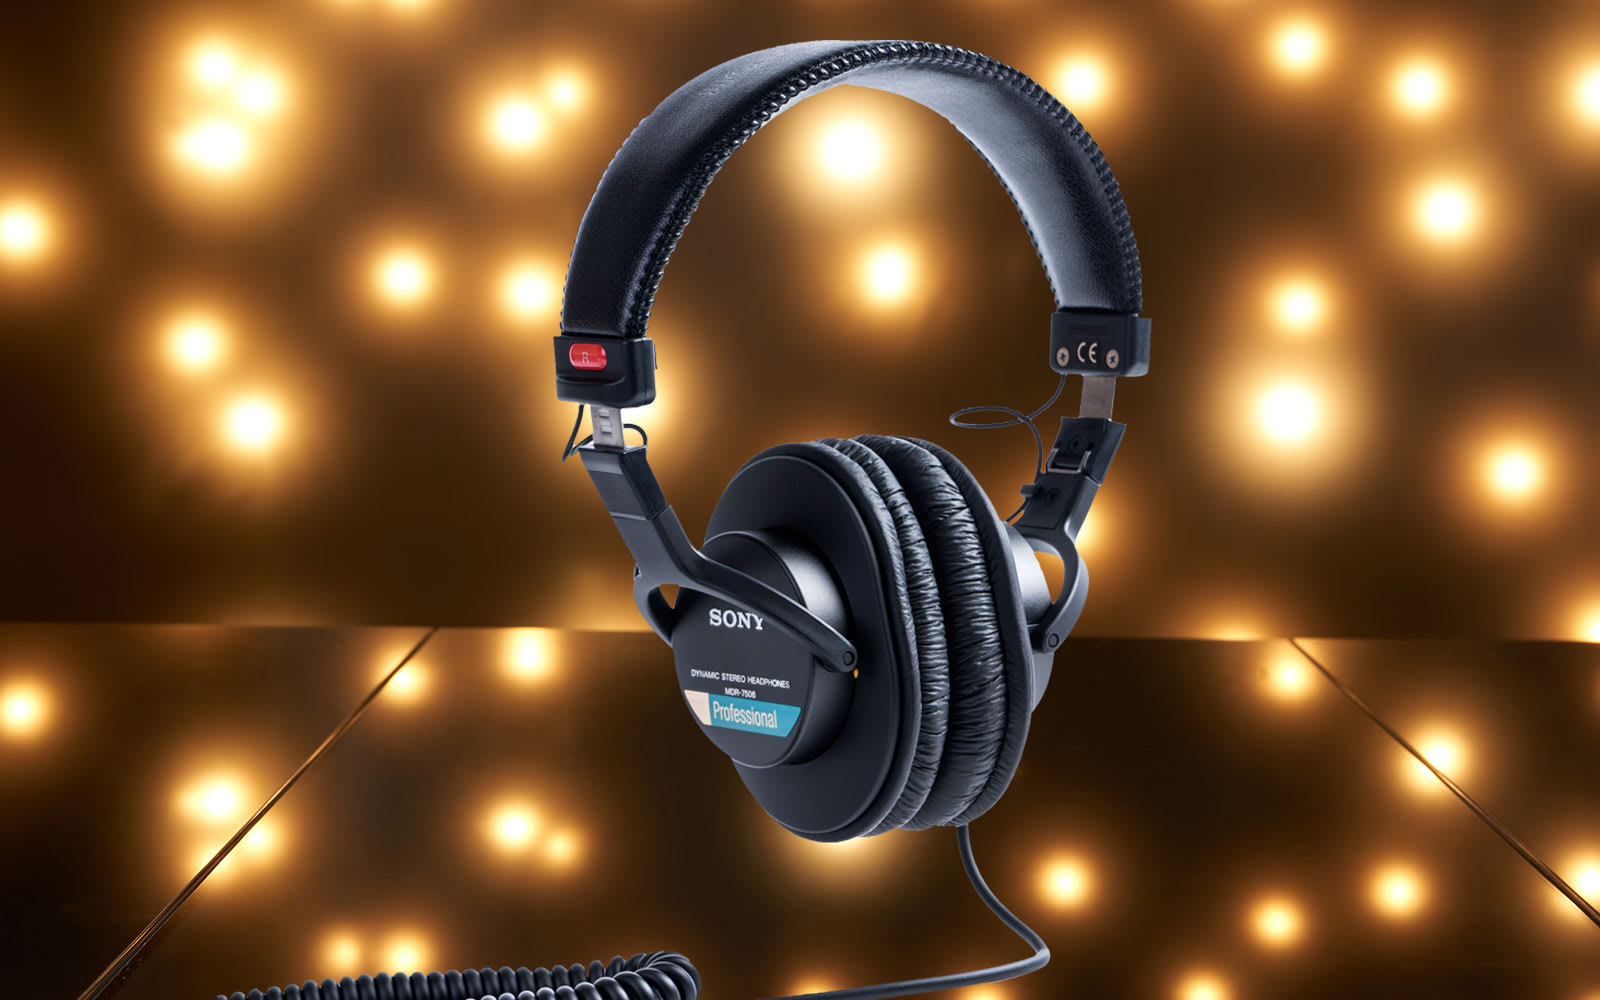
The Sony MDR-7506 headphones suspended in the air in front of a dark background dotted with bright light spots.
Will Lipman Photography for Engadget

This is an area that DeLay advises caution. While a good set of studio monitors will obviously be better than the speakers on your laptop and will result in a better mix, it's too easy to get caught up in what he calls monitor envy. "The reality is that monitors at a $300 price point are going to work just fine in most spaces," he says. Plus, your bedroom probably doesn't have the space to really make the most of large, powerful monitors. So, save your money.

And if you're just starting out, you're probably better off getting a decent set of headphones. There're tons of amazing and affordable studio quality headphones out there for under $200, like the $179 Beyerdynamic DT990PRO (currently down to just $179 on Amazon). But one of our favorites is an old workhorse from Sony, the MDR-7506. They're well under $100 and actual pros have used them for decades to mix music.

One tip DeLay offers for novices: Double check your mixes in the real world. Headphones can over emphasize bass, while smaller studio monitors can have trouble delivering accurate bass response. So make sure to listen to your track on laptop speakers or in a car to get a sense of how it will sound in the wild.

And that's really the key — have the patience to develop your skills and make the most of the gear you have. It's really easy to catch a bad case of GAS (gear acquisition syndrome) when you're first starting out — trust me, I know. But there's no need to shell out thousands of dollars for high-end gear to start making music. You don't even need to buy new gear. Pecora suggests the only thing you absolutely should buy new are headphones. And, presumably, that's just because you don't want to be wearing years worth of someone else's sweat on your ears.

The best smart speakers for 2024

There’s never been a better time to get a smart speaker, especially if you’re a music fan. When voice assistants first started infiltrating these devices, hands-free controls were really the star of the show. Even now, one of the most common ways that people interact with Siri, Alexa and Google Assistant is through a smart home speaker. But now you have dozens of options to choose from, and most of them sound much better than the first smart home products did. Sonos recently entered the game with its own voice assistant on its stellar-sounding speakers, and even lower-end models like the Echo Dot and Nest Mini have better audio quality than their first iterations did. If you're struggling to pick the best smart speaker for your needs, we at Engadget can help. We've outlined our top picks below, plus all of the things you should consider before buying a smart speaker today.

The first thing most people should do is decide what voice assistant they want to use. Google Assistant and Amazon's Alexa are both well-supported options that are continually evolving, with new features added at a steady clip. A few years ago, Alexa worked with more smart home products, but at this point, basically any smart device worth buying works with both.

It's mostly a matter of personal preference. If you’re already entrenched in the Google ecosystem and own an Android phone, it makes sense to stick with that. And if you have multiple Google-based smart devices in your home, you can use Google Home to easily control and navigate your devices. But while Alexa isn’t quite as good at answering general knowledge questions, it syncs just fine with things like calendars from your Google account. And it works with perhaps the widest variety of smart home products as well. If you’ve never used Alexa or Google Assistant, you can download their apps on your iOS or Android phone and spend some time testing them out before buying a speaker.

There are downsides to having a smart home device that’s always listening for a wake word, as giving more personal information to Amazon, Apple and Google can be a questionable decision. That said, all these companies have made it easier to manage how your data is used — you can opt out of humans reviewing some of your voice queries, and it's also less complicated to manage and erase your history with various digital assistants, too.

If you buy a Sonos device with a microphone, you can also use the company's own voice assistant, voiced by Giancarlo Esposito. It's focused purely on music control, so you won't use it to do things like send messages or ask the weather forecast. But as a music assistant, Sonos Voice Control is generally quite fast and reliable.

As for Apple, you won’t be surprised to learn the HomePod and HomePod mini are the only Siri-compatible speakers on the market. It’s rumored that Apple will potentially release a new range of smart displays, like its HomePod with a touchscreen, sometime soon. Apple's Siri has a reputation for not being as smart as Alexa or Google Assistant, but it’s totally capable of handling common voice queries like answering questions, controlling smart home products, sending messages, making calls and streaming music via AirPlay. Technically, Siri and Apple’s HomeKit technology doesn’t work with as many smart home devices as the competition, but it’s not hard to find compatible gear. And Apple has most definitely improved Siri’s functionality over the last couple years, with handy features like and Intercom tool and routines that take advantage of the built-in temperature sensor in the HomePod and HomePod Mini.

This article originally appeared on Engadget at https://www.engadget.com/best-smart-speakers-151515264.html?src=rss
The best smart speakers for 2023

Voice assistants are everywhere now – on your phone, in your TV, possibly even in your kitchen appliances. But one of the most common ways that people interact with Siri, Alexa and the Google Assistant is through a smart speaker, and there are now a wide variety of such devices available at a wide variety of price points. There are downsides to having a smart home device that’s always listening for a wake word, as giving more personal information to Amazon, Apple and Google can be a questionable decision. That said, all these companies have made it easier to manage how your data is used — you can opt out of humans reviewing some of your voice queries, and it's also less complicated to manage and erase your history with various digital assistants, too.

The good news is that there's never been a better time to get a smart speaker, particularly if you're a music fan. For all their benefits, the original Amazon Echo and Google Home devices did not sound good. Sonos, on the other hand, made great sounding WiFi-connected speakers, but they lacked any voice-controlled smarts.

That's all changed now. Sonos released its own voice assistant in 2022 and also supports Alexa on its latest speakers. Google and Amazon, meanwhile, made massive improvements in sound quality with recent speakers. Even lower-end models like the Echo Dot and Nest Mini sound much better than earlier iterations. With the growing popularity of these speakers, there are now more options than ever. Let’s walk through our choices for the best smart speakers at different price points and for different uses.

Picking an assistant

The first thing most people should do is decide what voice assistant they want to use. Google Assistant and Amazon's Alexa are both well-supported options that are continually evolving, with new features added at a steady clip. A few years ago, Alexa worked with more smart home devices, but at this point, basically any smart device worth buying works with both.

It's mostly a matter of personal preference. If you already use Google Assistant on your Android phone, it makes sense to stick with that. But while Alexa isn’t quite as good at answering general knowledge questions, it syncs just fine with things like calendars from your Google account. And it works with perhaps the widest variety of smart home devices, as well. If you’ve never used Alexa or Google Assistant, you can download their apps to your smart phone and spend some time testing them out before buying a speaker.

If you buy a Sonos device with a microphone, you can also use the company's own voice assistant, voiced by Giancarlo Esposito. It's focused purely on music control, so you won't use it to do things like send messages or ask the weather forecast. But as a music assistant, Sonos Voice Control is generally quite fast and reliable.

As for Apple, you won’t be surprised to learn the HomePod and HomePod mini are the only Siri-compatible speakers on the market. Siri has a reputation for not being as smart as Alexa or Google Assistant, but it’s totally capable of handling common voice queries like answering questions, controlling smart home devices, sending messages, making calls and playing music. Technically, Siri and Apple’s HomeKit technology doesn’t work with as many smart home devices as the competition, but it’s not hard to find compatible gear. And Apple has most definitely improved Siri’s capabilities over the last couple years, with handy features like and Intercom tool and routines that take advantage of the built-in temperature sensor in the HomePod and HomePod Mini.

Best smart speaker under $50: Amazon Echo Dot

Most people's entry point into the smart speaker world will not be an expensive device. Amazon's fourth-generation Echo Dot and Google's Nest Mini are the most obvious places to start for two important reasons. One, they're cheap: Both the Nest Mini and Echo Dost cost $50. Two, they're capable. Despite the low price, these speakers can do virtually the same things as larger and more expensive devices.

The Google Nest Mini was released in late 2019, but Amazon just refreshed the Echo Dot last year. The Echo Dot is the best small smart speaker for most people. Amazon keeps improving the audio quality across its Echo device line, and the Echo Dot is no exception. It produces much louder and clearer audio than I’d expect from a $50 speaker. The Nest Mini doesn’t sound bad, and it’s perfectly fine for listening in the bedroom while getting ready for the day, but the Echo Dot is a better all-purpose music listening device.

From a design perspective, Amazon broke the mold with the latest Echo Dot. Instead of a small puck like the Nest Mini, the new Dot is shaped like a little globe. It’s much bigger than the Nest Mini, but that size gives it room for higher-end audio components. The Dot keeps the handy physical volume buttons and mute switch on top, along with a button to activate Alexa's voice control. While the Dot doesn’t look as sleek as the Nest Mini, having physical buttons makes it easier to adjust volume and mute the mic. I do wish the Dot had a way to physically pause music; on the Nest Mini, if you tap the middle of the device, the music stops.

Another benefit the Amazon Echo Dot has over the Google Nest Mini is its 3.5mm audio out jack, which means you can plug it into other speakers and instantly upgrade the audio quality. When you do that, you can ask Alexa to stream music, and it'll output to whatever speaker you have connected. That'll help you get more mileage out of the Dot in the long run. The Nest Mini answers with a handy wall mount, for people who want to keep their counter or shelf clear. The Echo Dot’s new bulbous form is definitely not suited to this, so if you want a speaker you can really hide, the Nest Mini is probably the better choice.

Overall, the Dot is the best choice for most people, but I wouldn't hesitate to recommend the Nest Mini, either. I generally prefer using Google Assistant over Alexa, and anyone who feels the same should go ahead and get the Nest Mini. The Dot does sound notably better, so if you plan to listen to audio on a regular basis, that’s probably the way to go. But if you only plan to use it for a quick song or podcast when you’re getting ready in the morning, just pick your favorite assistant and go from there.

Best smart speaker under $100: Amazon Echo

Amazon, Apple and Google all have $100 smart speakers: the fourth-generation Echo, the HomePod mini and the Nest Audio, respectively. All three companies claim superior audio quality, so for lots of people these speakers will be the sweet spot between small speakers like the Echo Dot and Nest Mini and bigger, more expensive models like the Sonos Era 100.

Once again, Amazon punches above its weight. Like the Dot, the latest Echo is totally redesigned and the new internals were made with music in mind. It combines a three-inch woofer with two 0.8-inch tweeters — a more advanced setup than either the Nest Audio or HomePod mini. (The Google Nest Audio uses a three-inch woofer but only a single 0.75-inch tweeter, while the Apple HomePod mini makes do with a single “full range” driver and two passive radiators.)

In practice, this means the Echo is noticeably louder than either the Nest Audio or HomePod mini and much better suited to filling a large room than the competition. It also delivers an impressive bass thump and powerful mid-range frequencies. In fact, my main complaint with the speaker is that highs aren’t quite crisp enough. Compare the Echo to a Era 100 and the 100 sounds much more lively, while the Echo comes off a bit muddy. Then again, the 100 costs more than twice as much as the Echo.

While the Echo may beat the Nest Audio and HomePod mini on volume and bass, Google and Apple’s speakers are not bad options. The HomePod mini is the quietest of the three speakers, but it still sounds balanced across the entire audio spectrum. The bass isn’t too assertive, but there’s more presence than I would have expected given its tiny size (it’s by far the smallest of these three speakers).

And it has a few nice perks if you’re using an iPhone 11 or newer. Thanks to the U1 “ultra-wideband” chip in recent iPhones, the HomePod mini can tell when there’s a phone near it, which makes handing off music from your phone to the speaker (or vice versa) quite simple. Playback controls for the HomePod mini will automatically pop up as well, and your phone’s lock screen will display music suggestions if the speaker isn’t currently playing. Setup is also dead-simple — just bring an iPhone or iPad near the speaker and it’ll automatically start the process.

Google’s Nest Audio is also quite pleasant to listen to. It’s a little louder than the HomePod mini, and has stronger bass, to boot. It doesn’t have the same overall power and presence that the Echo does, but for $100 it’s a well-balanced speaker that should serve most people’s needs.

All three of these speakers support stereo pairing as well, if you want more volume or crave a more immersive experience. For $200, two Echoes will fill a large room with high-quality sound and enough bass to power a party. A pair of HomePod mini or Nest Audio speakers aren’t quite as powerful, but it makes for a great upgrade if you’re a more avid listener. A pair of Nest Audio or HomePod mini speakers sounded great on my desk during the workday. I don’t need overwhelming volume but can appreciate the stereo separation. And two of those speakers together can easily power a larger living space, although the Echo is the better choice if volume is a priority.

Here too, I think that picking the assistant that works best in your house and with your other gadgets is probably the most important factor — but given Alexa’s ubiquity and the new Echo’s superior sound quality, it’s the best smart speaker at this price point.

Best midrange smart speaker: Sonos Era 100

If you have more than a passing interest in music, the Echo Dot and Nest Mini aren't really going to cut it. Spending more money to upgrade to a speaker designed with audio quality in mind is one of the best decisions I've made. For years, I didn't have a proper home music solution, but in the end the modest investment has made my life much more pleasant.

For years, the Sonos One has been a favorite of mine, combining a reasonable price with good sound quality and a plethora of useful features like easy multi-room audio, stereo pairing and compatibility with tons of services. This year, Sonos replaced the One with the Era 100, a $250 speaker that is an improvement in almost every way you can think of. Most importantly, it uses a new speaker array that includes two tweeters instead of just one as well as a woofer that’s 25 percent bigger. The end result is that the Era 100 handily bests the One in sound quality, with impressive bass, surprisingly huge volume and increased high-end clarity thanks to the additional tweeter.

There are a lot of other improvements beyond just sound quality. The Era 100 uses its built-in microphones for much easier Trueplay tuning, which optimizes the speaker’s output based on where you place it. Previously, you had to use an iPhone and walk around the room waving the phone to optimize your Sonos speaker, but now the process is much simpler. The Era 100 also includes line-in via a USB-C port and also has Bluetooth for when you just want to quickly connect a device to the speaker. It’s a bummer that you need to buy an adapter to hook up a turntable or other audio equipment to the Era 100, but since the One didn’t support line-in at all, I’m still glad it’s an option.

There are a handful of other small but solid improvements, like redesigned controls on the top that make it easier to skip tracks and a mic mute switch that cuts the power to the mic for extra security. Like the One, you can set up Alexa or the Sonos voice assistant here, but the Era 100 doesn’t support the Google Assistant – so if you were previously using a Sonos speaker and relied on Google, you’re unfortunately out of luck here. Other than that one change, though, the Era 100 is an excellent all-around performer. It’s a great speaker on its own and is also a great starting point if you want to build a multi-room audio setup.

Amazon’s Echo Studio remains an excellent-sounding speaker as well, and at $199 it’s a good bit cheaper than the Era 100 as well. If you want to save some cash or already have a bunch of other Echo devices, it makes sense as a speaker for higher-quality music playback. But given that it’ll be four years old this fall, I think it makes sense to opt for a newer device that’ll get longer support and updates.

Best smart speaker for music lovers: Sonos Five

As nice as the Era 100 and Echo Studio are, there's only so much you can get out of them. If you crave more bass, clarity and stereo separation, the $550 Sonos Five is one of our favorite pure music speakers. It has many of the conveniences in the Era 100 and sounds significantly better than any other Sonos speaker. It also sounds much better than the Echo Studio and anything Google is currently selling.

That said, the Five stretches our definition of a smart speaker here because it doesn't have a built-in voice assistant. But it's so good at music playback that it's worth recommending you pick one up along with an Echo Dot or Nest Mini. Both of those speakers work with Sonos, so you can use voice commands to control the Five just as you would a dedicated Alexa or Google Assistant device. Sonos also refreshed the speaker two years ago with a new wireless radio as well as more memory and a faster processor. This means it should stay current and work with future Sonos software updates for years to come.

Since we're talking "best" here, I'm going to go ahead and recommend that true music junkies splash out on two Five speakers and pair them in stereo. Put simply, it's the most enjoyable experience I've had listening to music in years; I found myself picking up new details while listening to albums I've heard over and over again. It's a wonderful experience and worth saving for if you're a music lover. I didn't know what I was missing until I tried the Five.

Sonos also just released the Era 300, a $450 speaker that supports Dolby Atmos spatial audio from Apple Music and Amazon Music Unlimited. I’ve found that the quality of spatial audio mixes can be very hit or miss, but the good news is that the Era 300 sounds outstanding whether it’s playing back Atmos content or just standard tracks. It’s not quite as good as the Sonos Five, but it does have built-in microphones for voice assistants and easy Trueplay tuning as well as Bluetooth and the redesigned controls on the Era 100. Again, the main downside is that Google Assistant isn’t supported here.

Finally, if you’re an Apple Music user or have a lot of Apple hardware in your home, the second-generation HomePod is definitely worth considering. At $300, it’s a lot cheaper than these Sonos speakers but supports spatial audio like the Era 300. The Era 300 and Sonos Five are better speakers overall (and certainly much louder), but there's a lot to like about the HomePod’s audio quality at its price point. It’s a clear, crisp vocal-forward speaker, and its design and software processing does a great job of making music sound like it’s all around you, even if you’re not playing back Dolby Atmos tracks.

Best portable smart speaker: Sonos Roam

While many people will be happy with a few speakers strategically placed throughout their home, you might want something that works outside as well as inside. Fortunately, you can find speakers that pair voice controls and strong music playback performance with portable, weatherproof form factors. For my money, it's hard to beat the Sonos Roam for sheer versatility, not to mention audio quality.

When used inside the home, the Roam works like any other Sonos speaker. It fits in with an existing multi-room Sonos setup, or you can get a pair for stereo playback. Like most other Sonos speakers, it works with the Sonos Voice Assistant, Google Assistant or Amazon Alexa, and it supports essentially every major music service available. It sounds very good given its tiny size; it’s quieter and not quite as clear as the Sonos One or the Era 100, but it still packs a surprising bass thump and distinct highs.

Since it was designed with on-the-go usage in mind, the Roam has a battery and Bluetooth so you can take it anywhere and use it far away from your WiFi network. And its diminutive size makes it easy to take it everywhere, both around the house and out and about. It’s also the first Sonos speaker that is fully waterproof, as well as dust- and drop-resistant, so you shouldn’t worry about taking it to the pool or beach.

The Roam gets about 10 hours of battery life, whether you're on WiFI or Bluetooth. There are other portable speakers that last longer, so if you’re really going to push the battery you might be better served by another option.

Sonos also has another portable option, the Move. It’s much larger and louder than the Roam and has better sound quality, which it should given that it costs $400. But, rumors indicate Sonos is getting ready to replace it this fall with a new model. With that in mind, I’d recommend most people interested in a speaker like this wait to see what Sonos has coming up – $400 is a lot of money to spend on hardware that’s about to be replaced.

A better choice than the Move, unless you already have other Sonos products, is the $399 Bose Portable Smart speaker. It supports Alexa and Google Assistant commands, and since it can connect to WiFi, you can ask your preferred assistant to play music from Spotify, Amazon Music and other services. On top of that, it produces well-rounded sound, sports an IPX4 design with a convenient carry handle and will last up to 12 hours on a single charge.

Bose also has a good alternative to the Roam. The $149 SoundLink Flex supports Siri and Google Assistant commands, plus it has an IP67 design that's roughly the size of a small clutch bag. It pumps out bright, dynamic sound and can pair with other speakers for stereo sound, too – it's excellent and slightly cheaper than the Roam.

While this guide is all about smart speakers, we'd be remiss if we didn't mention all of the solid portable speakers out there that either have limited smart features or none at all. We have an entire guide to the best portable Bluetooth speakers, so if you’re purely concerned with portability and less about having an ecosystem of connected speakers, there are lots of options worth investigating.

This article originally appeared on Engadget at https://www.engadget.com/best-smart-speakers-151515264.html?src=rss
The best smart displays for 2024

Smart displays have evolved quite a bit since the initial debut of Amazon’s first Echo Show back in 2017. In fact, the category didn’t really come into its own until Google joined the fray with its own line of hardware about a year later. Now, both of these companies are essentially dominating the smart display landscape, with each offering their own take on a smart assistant with a screen.

It’s that screen that can make smart displays much more useful than smart speakers. Rather than just having a voice assistant recite the current weather report, for example, you can see a five-day forecast as well. The same goes for when you ask about your shopping list or calendar; it's simply easier to read the whole list or your day's appointments at a glance. Plus, touchsreens offer other benefits that speakers can't, like watching videos or checking your webcam to see who's at your front door. We've tested and used many smart displays over the years and below are a list of our top picks for the best smart displays you can get today.

The first question you should ask when looking for the best smart display for you is whether you prefer Amazon’s or Google’s ecosystem. If you have a lot of Google smart devices in your home, like Nest thermostats and security cameras, or even if you use a Google Pixel smartphone as your daily driver, then a Google-powered model may make more sense. If you have Amazon products, like a Fire TV Stick or a Ring cam, Amazon would obviously be a better choice from a compatibility standpoint. Of course, it's perfectly acceptable to have products from competing companies in the same home, but just realize they might not work seamlessly with each other from the start.

Aside from that, the two systems also offer some unique features. Google, for example, works best if you have an existing Google account and use services like Calendar and Photos. We especially love Google smart displays because they work well as digital photo frames. You can set it up to automatically pull in pictures of friends and family from your Google Photos library, and the algorithm is smart enough to use what it thinks are the best shots — so less chance of blurry photos or images of your eyes half-closed showing up, for example. But although you can use Amazon's displays as digital photo frames, the process is not quite as intuitive as Google’s, and Amazon doesn’t have anything comparable to Google’s photo-sorting algorithm.

It might seem like a minor point, but seeing as the display is on standby 90 percent of the time, its secondary function as a digital picture frame is very welcome. All Google smart displays also support YouTube and YouTube TV, step-by-step cooking instructions and all of the usual benefits of Google Assistant, like weather reports. As with Assistant on the phone, it also has voice recognition, so only you can see your calendar appointments and not others.

Amazon's smart displays, on the other hand, are slightly different. Instead of YouTube, they offer some alternative video streaming options, including Amazon Prime, NBC and Hulu. They also come with two browsers (Silk and Firefox), which you can use to search the web or watch YouTube videos – a handy enough workaround given the lack of a dedicated app. Amazon devices also offer step-by-step cooking instructions as well, thanks to collaborations with sources like SideChef and AllRecipes. The cooking instructions sometimes include short video clips, too.

This article originally appeared on Engadget at https://www.engadget.com/best-smart-display-202448797.html?src=rss

The best midrange smartphones for 2024

Great smartphones don't need to cost a fortune. Years of commoditization have brought features once exclusive to high-end devices – including big batteries, multi-camera arrays and high refresh rate displays – down to their more affordable siblings. While there are still some things you'll only find on flagship smartphones, you don't have to compromise as much anymore if you're looking to find the best buy at a lower price point. If you have less than $600 to spend, we can help you figure out what features to prioritize when trying to find the best midrange smartphone.

While the term shows up frequently in articles and videos, there isn’t an agreed-upon definition for “midrange” beyond a phone that isn’t a flagship or an entry-level option. Most of our recommendations for the best midrange smartphones cost between $400 and $600 — any less and you should expect significant compromises. If your budget is higher, though, you should consider flagships like the Apple iPhone 16 and the Samsung Galaxy S24.

Buying a new device can be intimidating, but a few questions can help guide you through the process. First: what platform do you want to use? If the answer is iOS, that narrows your options down to exactly one phone. (Thankfully, it’s great.) And if you’re an Android fan, there’s no shortage of compelling options. Both platforms have their strengths, so you shouldn’t rule either out.

Obviously, also consider how much you’re comfortable spending. Even increasing your budget by $100 more can get you a dramatically better product. And manufacturers tend to support their more expensive devices for longer. It’s definitely worth buying something toward the top limit of what you can afford.

Having an idea of your priorities will help inform your budget. Do you want a long battery life or fast charging speed? Do you value speedy performance above all else? Or would you like the best possible cameras? While they continue to improve every year, even the best midrange smartphones still demand some compromises, and knowing what’s important to you will make choosing one easier.

Lastly, pay attention to wireless bands and network compatibility. If you don’t want to worry about that, your best bet is to buy directly from your carrier. To make things easier, all the phones we recommend are compatible with every major US wireless provider and can be purchased unlocked. 

Every year, the line between midrange and flagship phones gets blurrier as more upmarket features and specs trickle down to more affordable models. When we first published this guide in 2020, it was difficult to find $500 devices with waterproofing or 5G. Now, the biggest thing you might miss out on is wireless charging. Just remember to budget for a power adapter too – many companies have stopped including chargers with their smartphones. Performance has improved in recent years, but can still be hit or miss as most midrange phones use slower processors that can struggle with multitasking. Thankfully, their cameras have improved dramatically, and you can typically expect at least a dual-lens system on most midrange smartphones below $600.

This article originally appeared on Engadget at https://www.engadget.com/the-engadget-guide-to-the-best-midrange-smartphones-120050366.html?src=rss

The best midrange smartphones for 2023

As one of Engadget’s resident mobile geeks, I’ve reviewed dozens of midrange phones and have found that a great smartphone doesn’t have to cost a fortune. Years of commoditization have brought features once exclusive to high-end devices – including big batteries, multi-camera arrays and high refresh rate displays – down to their more affordable siblings. If your budget is less than $600, I can help you figure out what features to prioritize when trying to find the best midrange phone for the money.

What is a midrange phone, anyway?

While the term shows up frequently in articles and videos, there isn’t an agreed-upon definition for “midrange” beyond a phone that isn’t a flagship or an entry-level option. For this guide, our recommendations for the best phone in this category cost between $400 and $600. Any less and you should expect significant compromises. If your budget is higher, though, you should consider flagships like the Apple iPhone 13 and Samsung Galaxy S22.

What factors should you consider when buying a midrange smartphone?

Buying a new device can be intimidating, but a few questions can help guide you through the process. First: what platform do you want to use? If the answer is iOS, that narrows your options down to exactly one phone. (Thankfully, it’s great.) And if you’re an Android fan, there’s no shortage of compelling options. Both platforms have their strengths, so you shouldn’t rule either out.

Obviously, also consider how much you’re comfortable spending. Even increasing your budget by $100 more can get you a dramatically better product. And manufacturers tend to support their more expensive devices for longer. It’s definitely worth buying something toward the top limit of what you can afford.

Having an idea of your priorities will help inform your budget. Do you want a long battery life? Do you value speedy performance above all else? Or would you like the best possible cameras? While they continue to improve every year, midrange phones still involve some compromises, and knowing what’s important to you will make choosing one easier.

Lastly, pay attention to wireless bands and network compatibility. If you don’t want to worry about that, your best bet is to buy directly from your carrier. To make things easier, all the phones we recommend are compatible with every major US wireless provider and can be purchased unlocked. 

What won’t you get from a midrange smartphone?

Every year, the line between midrange and flagship phones gets blurrier as more upmarket features trickle down. When we first published this guide in 2020, it was difficult to find $500 devices with waterproofing or 5G. Now, the biggest thing you might miss out on is wireless charging. Just remember to budget for a power adapter too – many companies have stopped including them. Performance has improved in recent years, but can still be hit or miss as most midrange phones use slower processors that can struggle with multitasking. Thankfully, their cameras have improved dramatically, and you can typically expect at least a dual-lens system on most midrange smartphones below $600.

The best midrange Android phone: Pixel 6a

There’s a lot to like about Google's Pixel 6a. For one, the Pixel 6a features the best cameras at this price. It may not have as many lenses as some of the other options on this list, but thanks to Google’s expertise in computational photography, the 6a delivers pictures that are on par with phones that cost hundreds more. Nighttime photos in particular are stellar thanks in part to Night Sight, which helps brighten up dim environments and bring out more detail.

The Google Pixel 6a has a few other things going for it. Thanks to its large battery and efficient chipset, you won’t have to worry about running out of juice. It lasted just over 19 hours in our battery testing, and Google's Tensor chipset allows the 6a to run very similarly to the Pixel 6 and 6 Pro handsets. And those who plan to hang on to their smartphone for as long as possible will appreciate that Google plans to support the 6a with software updates for the next five years.

In addition to its solid battery life and performance, the Google Pixel 6a even has some advanced features you may not expect to see on a midrange phone. Its design looks very similar to the flagship models with the striking camera bar on the handset's rear top half, and it has a 2,400 x 1,080 resolution OLED touchscreen with an under-display fingerprint sensor. You'll only get a refresh rate of 60Hz on the 6a, but that's a small sacrifice to make when you're getting a number of other features at a killer price.

The best (and only) iPhone under $600: iPhone SE

If you can get past its dated design and small 5.4-inch display, the Apple iPhone SE is the fastest phone you can buy for less than $600. No other device on this list has a processor that comes close to the SE’s A15 Bionic. What’s more, you can expect Apple to support the 2022 model for years to come. The company is only just ending support for the first-generation SE after six years. The company hasn’t said how long it intends to furnish the latest SE with new software, but it’s likely to support the device for a similar length of time.

For all its strengths, the iPhone SE is held back by a dated display. Not only is the SE’s screen small and slow, but it also uses an IPS panel instead of an OLED, meaning it can’t deliver deep blacks. Additionally, that screen is surrounded by some of the largest bezels you’ll find on a modern phone. That’s not surprising. The SE uses the design of the iPhone 6, which will be a decade old in two years. And if the SE looks dated now, it will only feel more tired in a few years.

The midrange phone with the best screen: Samsung Galaxy A53 5G

For the best possible display at this price, look no further than Samsung’s $450 Galaxy A53 5G. It features a 6.5-inch Super AMOLED display that is ideal for watching TV shows and movies. Plus the 120Hz panel is the fastest on this list. Other standout features of this Samsung phone include a 5,000mAh battery and versatile camera system. The A53’s three cameras may not deliver photos with the same detail and natural colors as the Pixel 6a, but it can capture bigger scenes with its two wide-angle lenses.

Like the other Android smartphones on this list, the Samsung Galaxy A53 isn’t the fastest performer. At best, Samsung’s Exynos 1280 is a lateral move from the Qualcomm Snapdragon 750G found in the Galaxy A52 5G. And though the A53 is $50 cheaper than its predecessor, this Samsung phone no longer comes with a power adapter and headphone jack, so the difference may not end up being much.

An ultra-budget 5G option: OnePlus Nord N200 5G

If you only have around $200 to spend on your next phone, you could do a lot worse than the OnePlus Nord N200. To start, this budget phone features a big 5,000mAh battery that will easily last you a full day. The N200 also has a 90Hz display and 5G connectivity, which are tricky to find at this price. Best of all, it doesn’t look like a cheap phone.

But the N200 is also a good illustration of why you should spend more on a budget phone if you can. It's the slowest device on this list, due to its Snapdragon 480 chipset and paltry 4GB of RAM. Its triple main camera system is serviceable during the day but struggles in low light and doesn’t offer much versatility beyond a disappointing macro lens. OnePlus also doesn’t plan to update the phone beyond the soon-to-be-outdated Android 12. In short, the N200 is unlikely to last you as long as any of the other recommendations on this list.

Chris Velazco contributed to this report.

A beginner’s guide to smart sous vide

French for “under vacuum,” sous vide cooking involves immersing vacuum-sealed food in a temperature-controlled water bath until the food is cooked to your liking. It might sound intimidating, and it’s true that this cooking method was once the province of professional cooks with expensive equipment. But that’s not the case anymore — not only is sous vide cooking more accessible than ever now, but there are a number of sous vide machines out there that don’t cost a fortune. And, like a lot of kitchen tools now, many sous vide devices even have companion apps and Wi-Fi connectivity that make the process even more automated. If you’re curious about giving sous vide cooking a go, we’ll walk you through the process of choosing the right machine for you and share some of the tips and tricks we’ve learned through our own experiments.

If you’re going to choose a sous vide machine, we definitely recommend getting a smart one, which means it either has Bluetooth or WiFi capabilities (or both). That’s because this often adds a whole lot more features than you might otherwise have. We suggest getting models with a companion app that will help you set up and monitor your sous vide temperature remotely. Bluetooth-only models work when you're within 30 to 40 feet of the cooker, while those with WiFi let you supervise your food from anywhere in your home, or as long as you're on the same network. We also tend to prefer apps that come with recipes already on it, especially if you’re new to sous vide cooking and need some help getting started.

Anova

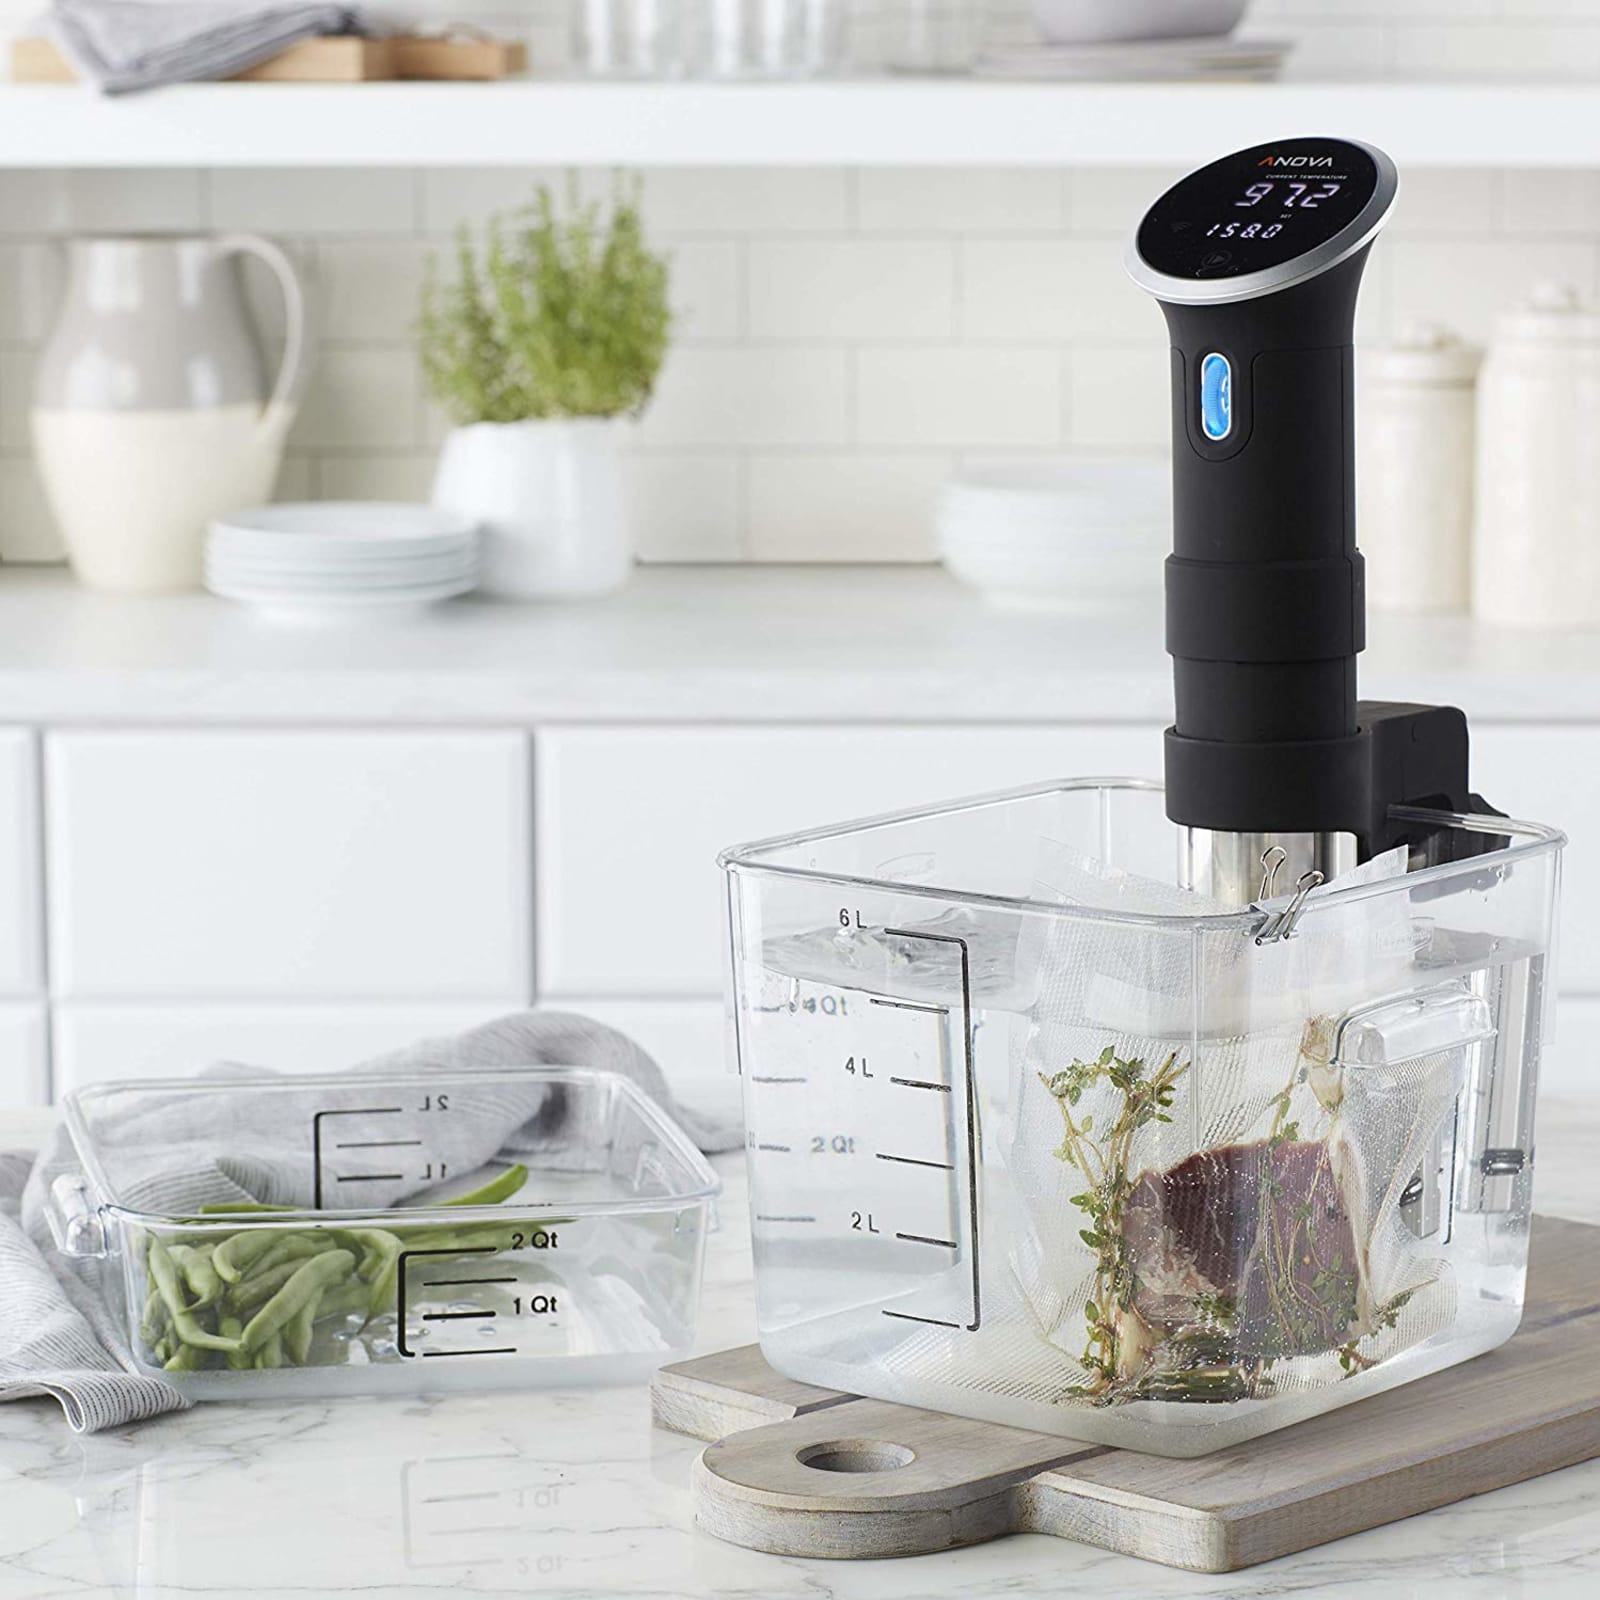
At a minimum, the other items you need to cook sous vide are a large metal pot (big enough to fill with water) and zipper-lock freezer bags to put the food in. Alternatively, you can use reusable silicone bags such as these from Stasher. Rather than using a vacuum sealer to get rid of air, you would use the water displacement method: Immerse the bagged food in the water while partially unsealed, and water pressure will push the air through the opening. Once everything is mostly underwater, you can seal the bag and it'll stay submerged.

If it still floats, you can stick one or two spoons in the bag, and that will hopefully weigh things down. (J. Kenji Lopez-Alt from Serious Eats also suggests using a large binder clip attached to the bottom of the bag along with a heavy spoon.) If you're concerned about water getting in the bag, you can attach the bag tops to the pot with binder clips, thus keeping the bag upright.

If you're really serious about sous vide, you might want to invest in some specialty equipment. Instead of pots, for example, you could opt for large restaurant-grade plastic containers by Cambro or Rubbermaid. Not only is plastic a better insulator than metal, but there's generally more space for more food, which is handy when you're cooking for a crowd.

Whether you use a pot or a plastic container, it's best to cover the vessel with plastic wrap when cooking for long periods, to keep evaporation to a minimum. Some companies, like Chefsteps, offer custom silicone pot lids that are made specially to accommodate their sous vide cookers. Alternatively, Lopez-Alt offers a much cheaper and more ingenious solution: cover your water in ping pong balls. They'll slow down evaporation.

Rubbermaid

Additionally, while zipper-lock bags work well for most tasks, it's still not a bad idea to get a vacuum sealer along with thicker plastic bags designed specifically for sous vide. For one, this lets you sous vide vegetables or braised meats, which typically require a higher temperature. (Zipper-lock bag seams might fail when it's that hot.) This also lets you freeze a bunch of food, vacuum seal them and sous vide packets straight from the freezer, which is convenient for batch cooking.

You likely already have this at your disposal, but another handy tool is a good skillet to sear your meat. That sous vide device might be able to cook your steak to medium rare, but it won't be able to brown it. A cast iron skillet, on the other hand, will. You could also consider a torch like the Bernzomatic TS8000, and we've seen others use a Searzall — but a cast iron skillet is far more affordable than either option. Of course, if you have a grill, you can use that too.

There are other miscellaneous items that could prove useful. Lopez-Alt likes having a pot lid organizer immersed in the container to help separate several submerged bags. If you want to make custard, yogurt or breakfast cups with your sous vide cooker, you should get yourself some mason jars too.

One more indispensable item worth considering: a trivet to rest your water vessel on so you don't destroy your countertop.

Since affordable sous vide cookers have been in the market for a few years now, there’s no shortage of recipes and guidelines online to help you figure out what to do with your newfangled kitchen gadget. The links below are some of our favorites, though bear in mind that a lot of this is based on personal taste. Your mileage may vary.

It only makes sense that the maker of one of the most popular sous vide machines also has a deep library of sous vide recipes. If you're ever at a loss as to what to make via sous vide, simply peek at this website, where you can search for recipes from professionals and amateurs alike.

We've mentioned it several times here already in this guide, but Serious Eats truly is a remarkably useful resource for all things sous vide. Its guide to sous vide steak is a favorite among Engadget staffers, as is its take on slow-cooked sous-vide style eggs, which results in some of the best eggs I've ever had.

Years before making the Joule, Chefsteps made a name for itself as a cooking school with a heavy emphasis on food science, tech and molecular gastronomy. That's probably why the sous vide recipes from Chefsteps are some of the more creative ones we've seen. One recipe, for example, teaches you how to make that perfect chicken breast along with the perfect accompaniment for said chicken breast — perhaps a crunchy apple fennel salad and a buttery carrot puree. Other favorite recipes include wonderfully tender salmon filets, juicy pork chops and Chefsteps' own interpretation of the "sous vide egg bites" you sometimes find in certain Starbucks shops.

This is actually a cookbook from the people behind the Nomiku WiFi sous vide machine (which has since been discontinued), but the recipes in it will work with any sous vide device. Not only does it have beautiful photographs, but it also offers fantastic recipes like jerk chicken wings, duck confit and chocolate pots du creme.

Instant Pot Smart WiFi
Instant Pot / Best Buy

Aside from immersion circulators like the ones mentioned here, you could also opt for multi-purpose appliances that offer sous vide-like functions. Several Instant Pots, for example, offer such a feature. Unfortunately, however, they do not circulate the water like the aforementioned immersion circulators, and the temperatures aren’t quite as precise (which is a definite downside if you need something cooked to a specific temperature). But if you don’t really care about that, or you just want to dabble occasionally in sous vide, this might be a viable option.

If you’re dead set on a multi-tasking appliance and you have the money to spend, consider the Anova Precision Oven. Thanks to its use of steam, you can indeed use it to cook foods via sous vide but without the need for plastic bags. It also uses a fan to circulate the moist air around the food and a probe thermometer helps keep foods at a precise temperature. And, of course, the Precision Oven can be used as a regular oven as well, and is great for baking breads and bagels. It is, however, quite expensive at $700 and takes up a lot of counter space.

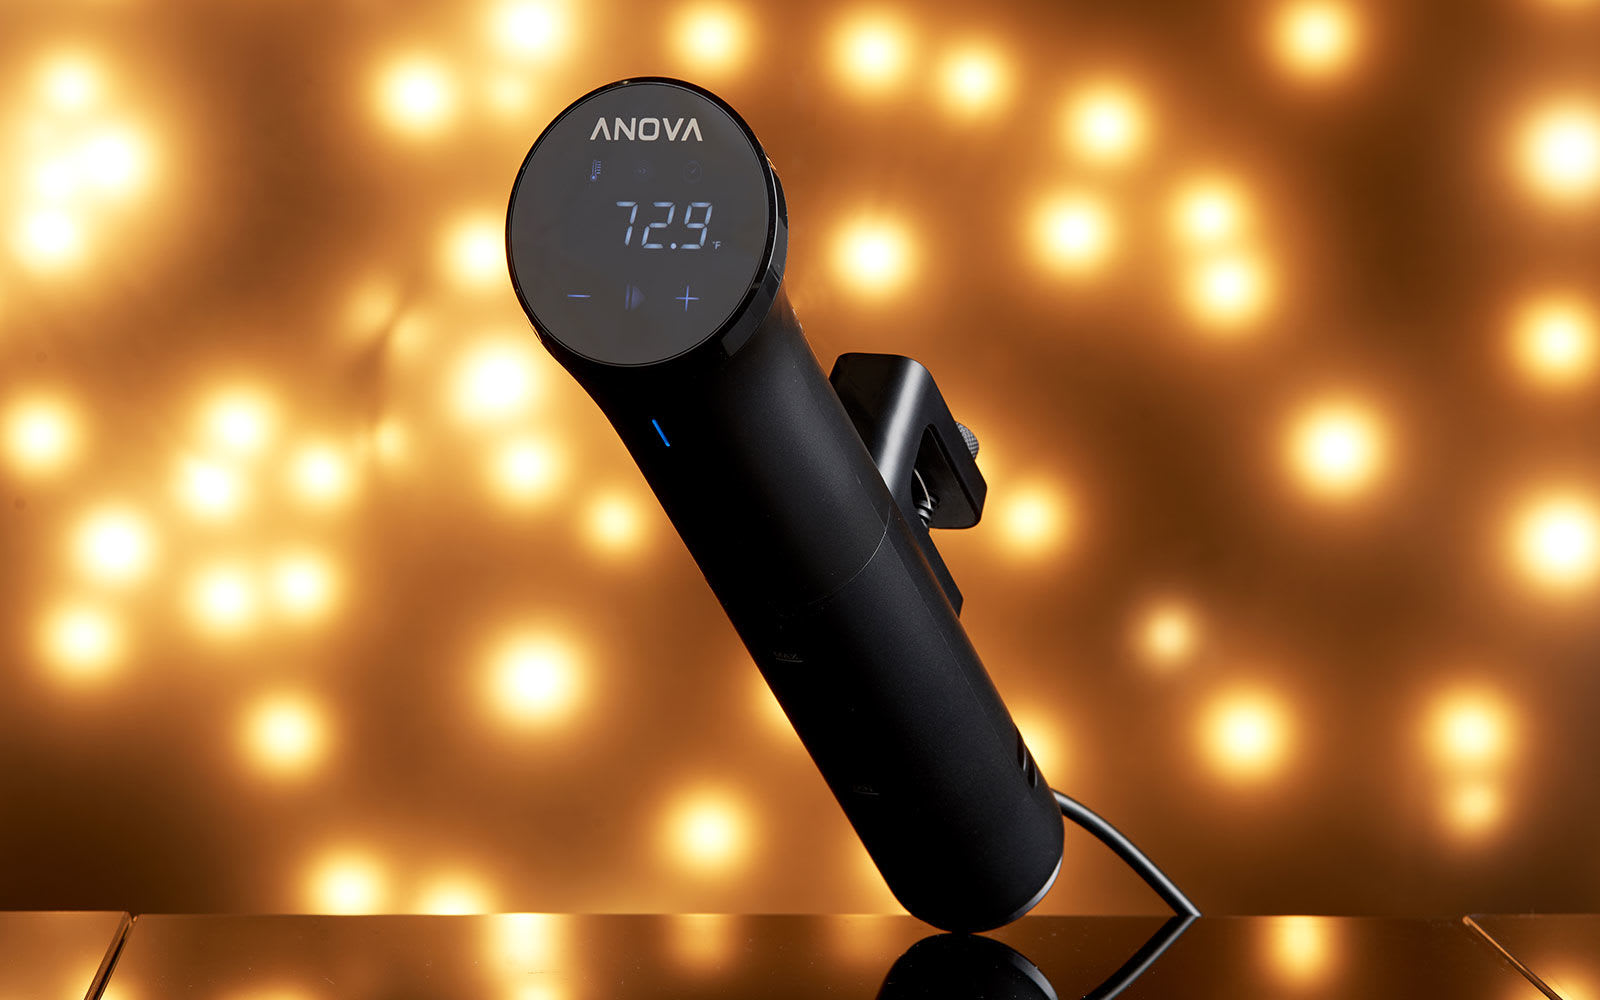
Images: Will Lipman for Engadget (Anova / holiday light background)

This article originally appeared on Engadget at https://www.engadget.com/smart-sous-vide-guide-151821790.html?src=rss

The best podcasting gear for beginners

Starting a podcast is easy. Making one that actually sounds good is another story entirely. We can't help much with the bigger problems facing would-be podcasters — finding a good topic and getting people to listen — but we can point you to the best gear to get started. With a few smart purchases, you too can sound like a podcast pro.

Get a decent microphone

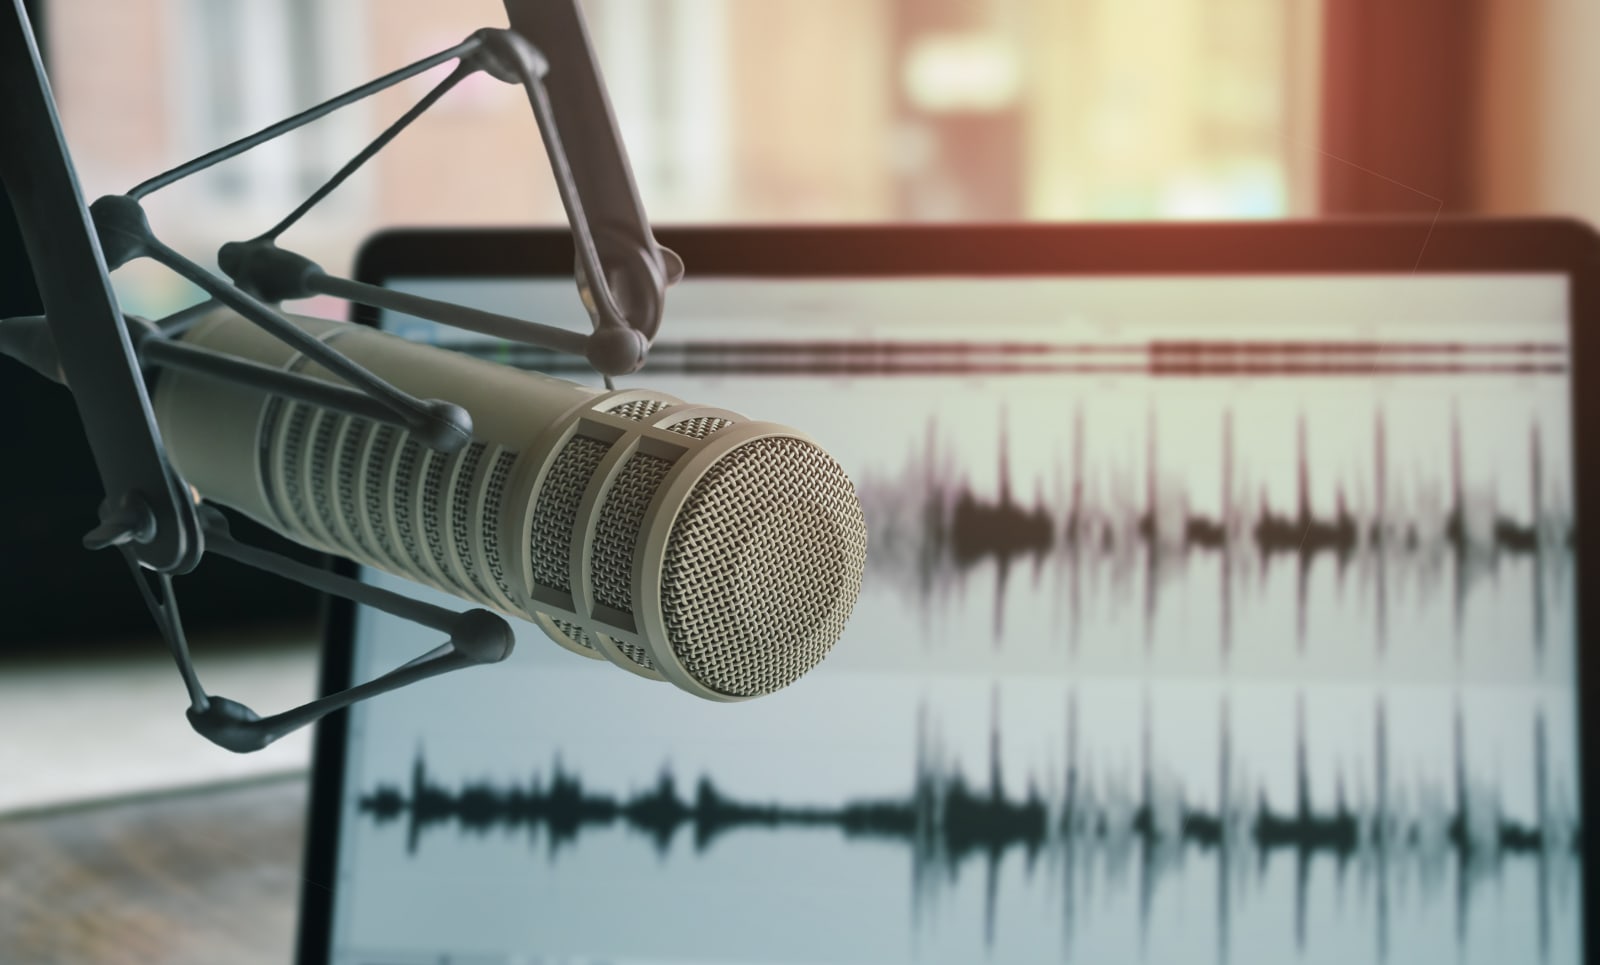
You need a good microphone. There's no arguing with this. It doesn't matter if you're starting your own show or planning to guest on someone else's podcast. A great microphone will elevate your voice to help you get the sort of depth and richness you hear on the radio and popular shows like Radiolab. While you could record with your phone or your PC's webcam mic in a pinch, nobody wants to hear that every week.

Blue Yeti

We strongly suggest starting with a solid USB microphone. They can connect easily to any computer (or even phones and tablets with a dongle), and they'll offer a huge leap in sound quality. Previously, we’ve recommended the Blue Yeti as the ideal beginner mic. It’s easy to use and sounds great for the price. But it’s also a condenser microphone, which means it’s not great for the noisy environments most newfound podcasters are recording in. So this year, we’re suggesting you jump straight to an inexpensive dynamic microphone like the Audio Technica ATR-2100X.

Buy Blue Yeti at Amazon - $130Buy Audio Technica ATR-2100X at Amazon - $99

Dynamic microphones do a better job of isolating your voice and cutting out background noise — the only downside is that you need to speak close to it like a radio host. The ATR 2100X also has USB-C and XLR connections, which means you can easily bring it over to a more professional audio interface down the line, or drag it along to a friend’s studio.

There are cheaper USB microphones out there like Blue's Snowball ($80) and AmazonBasics' Mini Condenser ($45), but you’ll pay for going cheap with noisier recordings. If you're serious about podcasting, it's worth spending a bit more up front: There's a good chance you'll end up chucking a cheaper mic once you hear the difference.

Buy Blue Snowball at Amazon - $80Buy AmazonBasics Mini Condenser at Amazon - $45

Pro tip: RTFM

You should actually read the instructions and make sure you know what every dial and button does. Most importantly, make sure you're speaking in the right direction! With most microphones, including the Blue Yeti, you want to aim at the side with the brand label. Some models, like the ATR2100X and other dynamic mics, need to be addressed from the top. Yes, I know this all sounds basic, but I've encountered dozens of people who end up aiming for the wrong part of their mics when they're getting started.

It's also worth picking up a few accessories to make your recordings sound great. Get a pop filter or foam cover to avoid plosives (that annoying titutal pop when you make "p" sounds). If you're going to be recording regularly, it's worth investing in a tabletop arm to hold your mic in an optimal position (and also avoid the extra noise you get from desktop stands).

You could, of course, start exploring more-expensive microphone options, but I'd suggest holding off on those until you're more committed to the podcasting life. The next big level up from USB options is the world of XLR microphones, the same interface used for professional audio gear. You'll also need a USB audio interface, like the Tascam US-2x2 or FocusRite Scarlett 2i2 ($170), to connect those mics to your computer. At that point, you can start looking at higher-end options like the Rode Procaster ($224). It sounds noticeably richer than the Yeti, and since it's a dynamic microphone, it's also better at cutting out unwanted noise.

Here's some advice: You can save quite a bit by buying all this equipment used or refurbished. I saved $100 on the excellent Shure PG42 USB microphone years ago by going through eBay.

Buy FocusRite Scarlett 2i2 at Amazon - $170Buy Rode Procaster at Amazon - $224

Choose your audio-editing weapons

Now that you have the hardware, you need some software to put your show together. There's no avoiding this part: You need to learn the basics of audio editing. Luckily, there's Audacity, a free, open-source audio editor that works across every computing platform. Its UI is ugly and a bit archaic, but it's also pretty powerful once you get a handle on it. I've edited all of my shows with Audacity, and aside from a few annoying crashes and quirks, it suits my needs well.

If you're looking for something more robust or you grow tired of Audacity, the free version of AVID's Pro Tools is worth a look, and there's Reaper by Winamp creator Justin Frankel. They're both full-fledged digital audio workstations (DAW), and Reaper also has the bonus of working with plenty of tools and plug-ins. At the high end of the spectrum, there's Adobe Audition, but at $21 per month, or $240 for the year, it's not worth considering until podcasting has become your life.

AKG K Series Production Headphones

Get good headphones

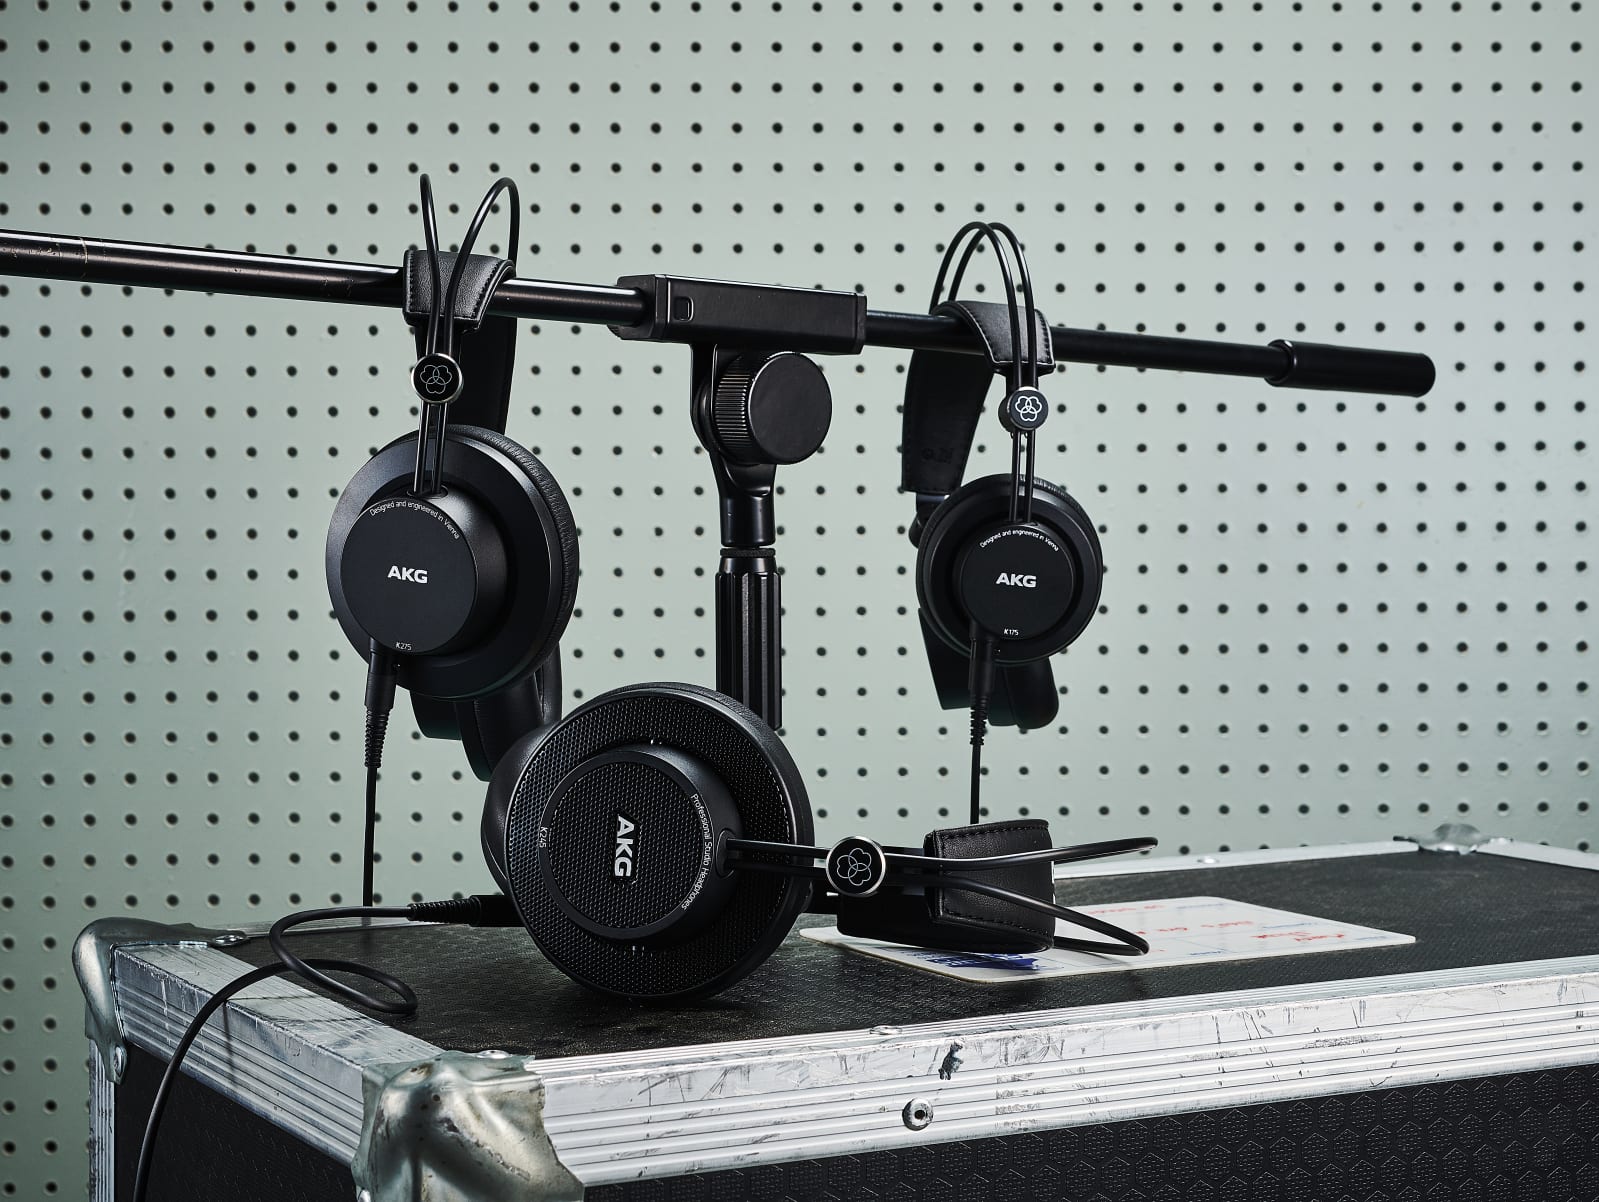
Headphones are the best way to monitor your recordings — that is, to hear yourself as you're recording — as well as to make sure they sound great once completed. You'll definitely want something better than the earbuds that came with your phones. We recommend starting with something like Sony's MDR-7506 ($98), a pair of over-the-ear headphones that have been studio mainstays for decades. They offer a neutral sound and a light fit, exactly what you'll need for hours of editing. If you've already picked up a pair of great headphones, those will work fine. (Be sure to turn off any noise-canceling features, though, as they can color what you're hearing while monitoring recordings.)

We're not going to go down the rabbit hole of recommending large speakers like you'd find in a real studio. They're not worth it for podcast editing, and most people will be listening to your show with headphones anyway. Of course, if you make something that sounds great on headphones, it'll probably be fine on speakers.

Buy Sony MDR-7506 at Amazon - $98

Prep your recording altar

You can't just set up your fancy new microphone anywhere! You'll want to find a room that's as quiet as possible, or even a small closet. If both of those options are out, carve out some space in the corner or along a wall of a larger room. Wherever you set up, you'll need to treat your space a bit with some foam wedges or other sound-absorbing objects. You can always go the simple route: Drape a curtain or blanket over your desk to create an isolated sound-dampened spot.

Learn how to record with friends

So now you're all set to record a podcast on your own. But how do you bring in a co-host or guest? That's where things get a bit complicated. You could chat with a friend over Skype and record their audio using something like Total Recorder on Windows or Soundflower on Mac. You'll want to make sure the other person is also aiming for the best audio quality with a high-quality mic. In a pinch, you can have a guest record a voice memo on their phone (but be sure to follow NPR's phone-recording guidelines).

To simplify remote group recordings, you could consider web-based services like Zencastr and Cast, which automatically capture high-quality local audio. They’ll get you better quality than a Skype recording, since you’re not dealing with compressed audio from your guests. These services let you quickly edit and process recordings online as well. While they may sound like podcasting heaven, there are issues to watch out for. Network interruptions could easily render a session useless, and they’re demanding on systems with minimal RAM. If you go this route, be sure to have backup recordings.

For the most control, your co-host can record their side of the conversation on their end and send it to you afterward. This obviously introduces additional layers of complexity, like making sure your audio stays synchronized throughout the whole recording. It's also tougher to edit, since you're juggling multiple files on a timeline instead of one. But honestly, the quality bump is worth it. If you're looking to hone your audio-editing skills, there are online tutorials like this Udemy course or YouTube instructional videos.

Recording with another person physically near you is a bit tougher. Some mics like the Blue Yeti have modes for shared recording. Otherwise, you'll need to get a USB audio interface to plug multiple XLR mics into your computer. If you're going that route, you'll have to be extra careful about avoiding crossover recordings on those mics. If you're looking to record interviews on the go, nab a digital audio recorder like the Zoom H1n ($120) and a few mics like Rode's Lavalier Go ($79). Since it won't sound nearly as good as a home setup, I wouldn't recommend this as your main recording method (unless you invest in a powerful recorder with support for pro-grade XLR mics).

Buy Zoom H1n at Amazon - $120Buy Rode Lavalier Go at Amazon - $79

Choose a podcasting service

Once you've locked in an episode or two, it's time to start exploring podcast hosts. These will host your files, give you a feed you can subscribe to in any podcast app and usually help you list your show on iTunes, Spotify and other services. Most important, you can get some detailed analytics from hosts, and if you get popular enough, they can also help you nab some sponsorships. You can get started for free with Acast, $5 per month with Libsyn, or $10 per month with Audioboom.

Photos: avdyachenko (Mic setup); Olly Curtis/Future Publishing via Getty Images (AKG headphones); Getty Images (podcast interview)